
Gear Testing, Hardware, Tech Tips
Phase One’s Electronic Shutter in Detail
Aug
We first wrote about the sensor-based Electronic Shutter (ES) when the IQ3 100mp added this feature in 2016. Since the IQ4 150mp improves the speed, features, and flexibility of the Electronic Shutter (ES) we thought we’d take another look at this incredibly powerful feature.
A sensor-based Electronic Shutter (ES) option is available on the Phase One IQ4 150mp, Phase One IQ4 150mp Achromatic, Phase One IQ3 100mp and Phase One IQ4 100mp Trichromatic. In contrast to a Mechanical Shutter such as a Leaf Shutter or Focal Plane Shutter, the Electronic Shutter (ES) works by turning the imaging sensor on and off. It’s an entirely different way of controlling the start and end of an exposure and comes with a distinct set of pros and cons.
If you have any questions, or would like to test any of these features please contact us to set up a demo, rental, or studio visit.
Pros of the ES
- No Moving Parts: There is no physical shutter having to open and close, so no wear and tear.
- Vibration Free: Similarly, with no moving parts, no vibration is created by the ES.
- 100% Silent: Other than an optional beep the electronic shutter is completely silent.
- Flexibility: Allows use of shutterless lenses and shutterless bodies
- Features: Allows touch-free bracketing and time-lapse on tech camera bodies (IQ4 only)
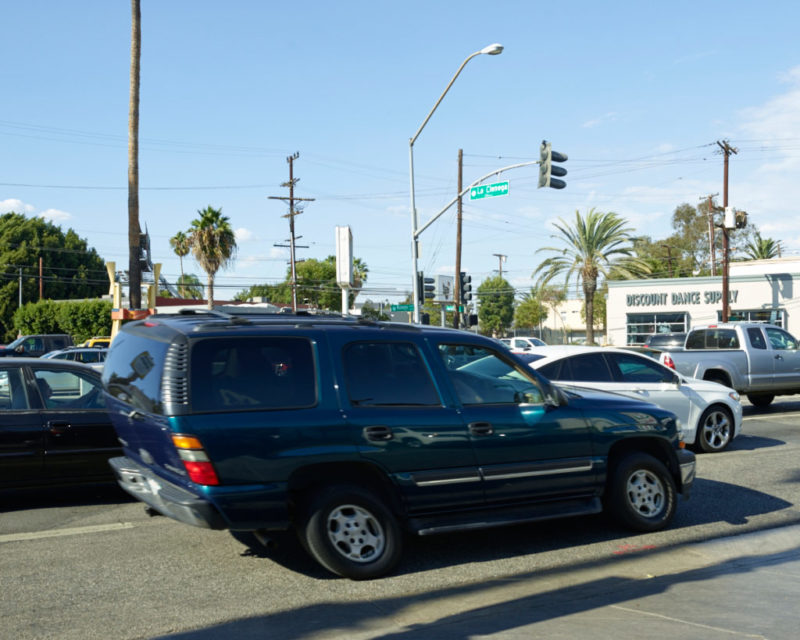
Rolling Shutter effect distorting a passing vehicle. Taken on the IQ3 100mp.
Cons of the ES
- Rolling Shutter Effect: The ES reads out the image in rows from the top of the sensor to the bottom over a period of about a second. Subjects moving quickly across large parts of the frame will be distorted.
- Slow Flash Sync: Because of the rolling nature of the ES, strobe sync is limited when using the Electronic Shutter at ISO 400 and lower.
- Silent: Also listed as a pro, we list it here because, frankly, it can be a bit disconcerting to capture a high-resolution 16-bit raw file with zero shutter sound.
- Manual Dark Frame (only required on tech cams): When using the ES on a tech camera like a Cambo or Arca the digital back needs the user to cover the lens (e.g. with the lens cap) for the dark frame on at least the first frame. On an XF the camera can take care of the dark frame automatically by closing the focal plane shutter.
Sweep Speed for Each Model
The sweep speed of the electronic shutter is different for each model that provides it as a feature, and changes depending on the ISO and bit-depth selected by the user. The sweep speed determines the flash sync speed, the maximum frame-rate, and the speed at which subjects will show a noticeable rolling-shutter effect. A faster sweep speed is more desirable in all cases.
|
IQ4 100mp Trichromatic IQ3 100mp IQ3 100mp Trichromatic |
IQ4 150mp IQ4 150mp Trichromatic |
|
|
16-bit, ISO 400 or lower |
1.3 sec |
~0.6 sec* |
|
16-bit, ISO 800 or higher |
1.6 sec |
TBD |
|
14 bit, ISO 400 or lower |
0.6 sec |
~0.3 sec* |
|
14 bit, ISO 800 or higher |
0.8 sec |
TBD |
*Spec still being finalized.
For example, the IQ4 150mp can sync with flash at up to 1/1600th using the shutter of a Schneider LS lens, but when using the sensor-based electronic shutter the fastest sync speed is 0.3 seconds. At speeds faster than that the IQ flash sync port will be disabled and if an XF is being used the hot shoe and XF sync port will also be disabled.
Beneficial Use Cases
Since ES is “rolling” in nature, it is only useful in situations where the camera is on a tripod and the subject matter is not moving quickly through the frame. Localized movements, such as the movement of leaves in a gentle breeze in a wide-angle landscape image is typically fine, since each individual line of pixels (and any small number of rows in a row) is read out very quickly; it is the vertical of the sensor that is read out at the slower speed.
Therefore ES is most commonly useful in the below kinds of photography:
- Product and Still Life: where the camera and subject are nearly always stationary anyway
- Macro photography: where the vibration of a traditional shutter poses a challenge to sharpness
- Tech camera users: like the Arca Swiss RM3Di where an alternative to legacy copal shutters is desired
- High volume photography: like Cultural Heritage Digitization where the unlimited lifetime of an ES will be a boon
- Film Scanning: where both volume and vibration give an ES a distinct advantage over mechanical shutters
- Shutterless Cameras: an ES allows the use of a shutterless lens like the Canon 17TS to be used with an IQ4 150mp on a shutterless body like the Cambo Actus.
ES Capability & Compatibility
Bodies: The Electronic Shutter can be used with the Phase One XF camera or technical cameras.
Deflicker: Some types of lighting that are non-continuous can interfere with the ES and cause banding. To prevent this you can enable deflickering at either 50hz or 60hz. Non-continous lights in the US operate at 60hz while non-continuous lights in Europe operate at 50hz. Since Phase One is based in Europe (Copenhagen, Denmark to be precise) our US clients will need to change this from the default 50hz value.
Shutter Speed Range: Regardless of the body it is used with the ES can be set between 1/4000 sec and 1 hour in 1/3rd stop increments. When using the deflicker setting the fastest shutter speed is 1/125. Note that when using ES you cannot sync with flash at faster than the sweep-speed (see “Sweep Speed for Each Model” above).
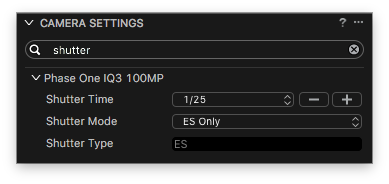
Shutter Mode lets you pick from LS Priority, FPS Only, and ES Only.
How to Access ES when using XF:
When a back with electronic shutter is mounted to an XF body, the ES can be selected via the XF “Capture Setup > Shutter” Menu – the same place where the user can select Leaf Shutter Priority or Focal Plane Shutter Only. This can also be accessed via the XF Menu on the LCD of the IQ Digital Back or via the Camera Settings Tool in Capture One Pro.
How to Access ES when using Tech Cameras (IQ3)
When mounted on an RCam or a technical camera, the Electronic Shutter mode is accessed from the menu on the digital back LCD. When you activate the Electronic Shutter, the bottom right WB menu option is replaced with ES.
Upon tapping the ES Button, you are taken to a straightforward control screen.
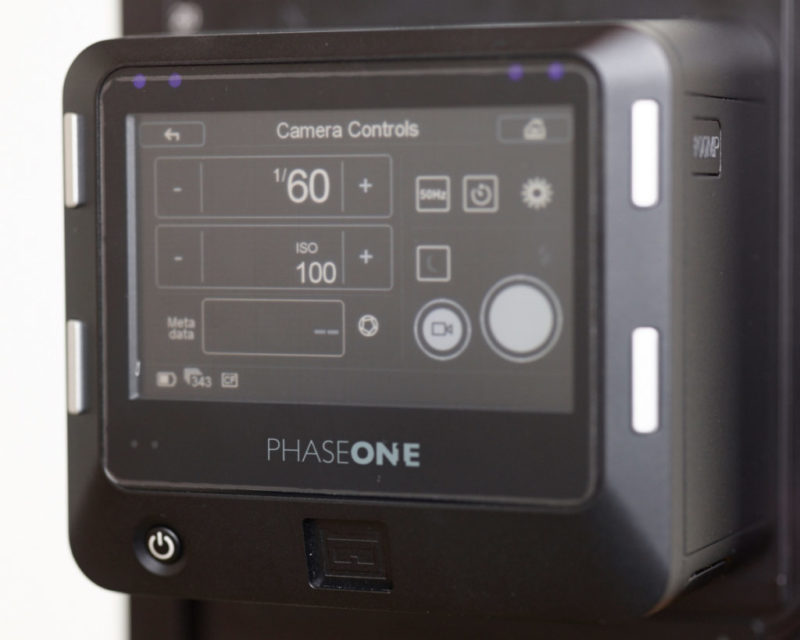
ES Control Screen.
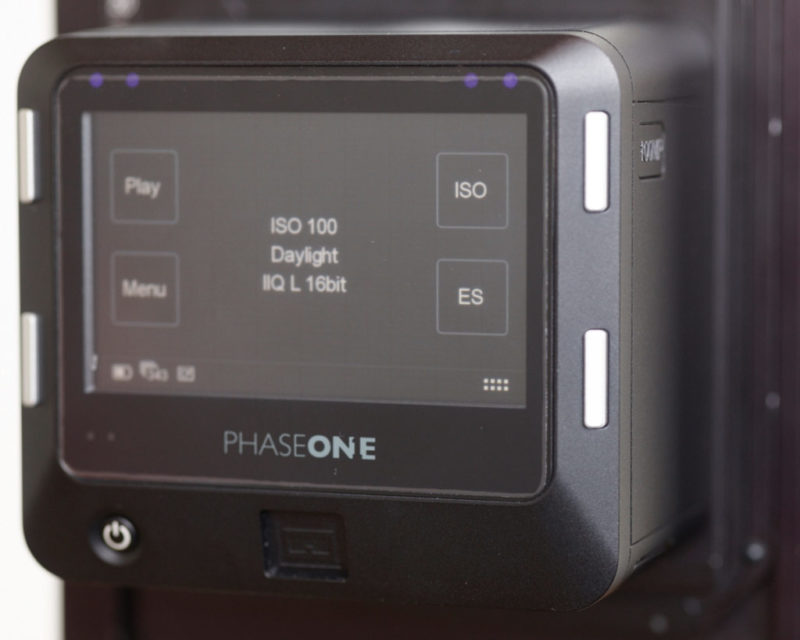
When ES is activated, it takes the place of WB on the main menu.
The left half has controls for shutter speed and ISO. The shutter speed has the same range as the Focal Plane Shutter on the XF Body and the ISO has the same range that the back normally does. The lens of a technical camera does not communicate the lens’ aperture to the digital back. Accordingly, in the bottom left the user can manually select an aperture from ƒ/1.0 to ƒ/90 with increments of 1/3 stop to be written into the file’s metadata. The right side of the menu lets you toggle between 50Hz/60Hz de-flicker frequency; the right side also provides buttons for a self-timer, white balance, a live preview button, and a large shutter release button, all of which are self explanatory. The self-timer is especially handy to prevent the vibration of touching the shutter release from blurring the image. The final button is to toggle the behavior of the Dark Frame which is described in more detail below.
Dark Frame Control (IQ3)
Dark Frame subtraction reduces noise by capturing an image in the dark for the same length as the initial exposure. The dark frame is then subtracted from the initial exposure (and subsequent images) to correct for noise build up. In XF Feature Update 3 the dark frame can be set to three settings.
- As Needed (default)
- Always
- First Frame Only
The “First Frame Only” setting will be most useful for shooting zero-gap time lapse, star trails, or other applications where it’s important to have the next exposure start immediately after the previous exposure. For example, a timelapse at night might require several hours of 20 second exposures; the user can select “First Frame Only” and capture one 20 second exposure which will be followed by a dark frame, and then begin a sequence of thousands of frames that are not followed by a dark frame. DT has a lot of experience with Time Lapse and is developing a suite of tools for up to 12k time lapse.
To create a dark frame the sensor must be in complete darkness. How this is normally accomplished depends on the camera body the back is attached to.
- XF: When using an XF the camera can use its built-in shutter. This is done after and separate from the main exposure so that no vibration whatsoever occurs during the exposure.
- Tech Cam (Arca/Cambo/similar): The user must manually close the lens shutter or place a lens cap over the lens. Placing a hand over the lens is not sufficient.
- DT RCam: The Shutter Control software on the computer can be used to close the shutter. This is also where the user would select an aperture.
In the case of the Tech Cam and DT RCam the user must currently tap on a button on the LCD of the IQ3 digital back.
Dark Frame Control (IQ4)
The dark frame control on the IQ4 has been greatly improved. We will update this article with a step-by-step guide soon.
Case Study: Focus Stacking (IQ3)
Focus stacking doesn’t require ES, but it greatly benefits from it. In focus stacking many, sometimes hundreds, of images shot at slightly different focus points are stacked together to form a final image. XF Feature Update 2 introduced automated Focus Stacking for the XF Body. Reducing vibration is paramount when it comes to focus stacking. Seeing the XF execute a focus stack in ES Only mode is pretty striking. Here we kept the default “beep” on; if we turned it off there would be no audible indication the focus stack is in progress, only the visual of the slight movement of the lens and the numbers on the LCD.
BELOW: XF FOCUS STACKING USING THE LEAF SHUTTER AND FOCAL PLANE SHUTTER AND MIRROR UP. AUDIBLE SOUND ON EACH CAPTURE CAUSED BY THE FOCAL PLANE SHUTTER.
BELOW: XF FOCUS STACKING USING THE ELECTRONIC SHUTTER (ES) AND MIRROR UP. THE ONLY AUDIBLE SOUND IS THE BEEP OF THE DIGITAL BACK INDICATING A COMPLETED CAPTURE.

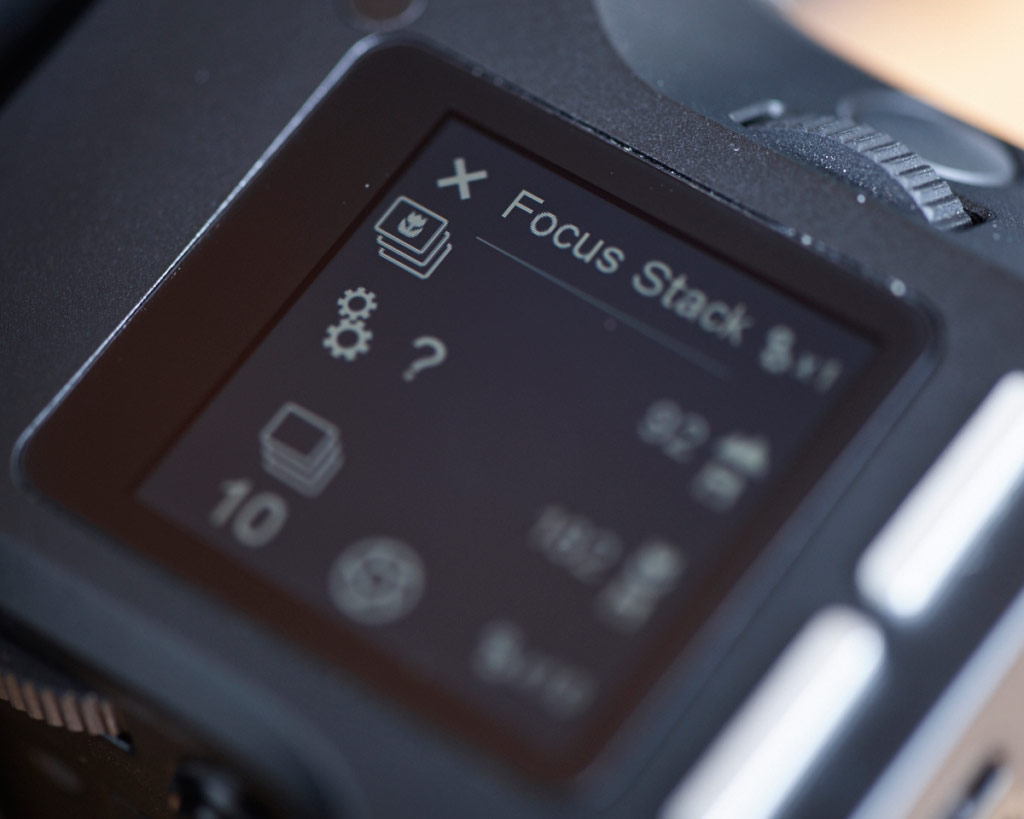
A new icon for more options in Focus Stacking.
Note that we kept the default “beep” on; if we turned it off there would be no audible indication the focus stack is in progress, only the visual of the slight movement of the lens and the numbers on the LCD.
The Electronic Shutter for Focus Stacking can either be activated through the XF’s Capture Setup Menu or through a new settings icon on the Focus Stacking screen, which is located on the top left of the Focus Stacking screen right below the X.
Tapping the new settings icon will show options for Capture Delay and ES. This allows the user to use ES for Focus Stacking without changing the setting for regular captures.
Do Your Own Test
If you’d like to conduct your own testing, or arrange for us to do other tests, please don’t hesitate to contact us. We love helping photographers evaluate their options, and maintain a large inventory of medium format gear on hand for just that purpose.