
Capture One, Firmware, Gear Testing, Phase One
Phase One Lab, DualExposure+, and the Death of Digital Noise
Mar
Please note that the new version of Capture One 20 released today (version 20.0.3) is required to take advantage of DualExposure+. You can upgrade your current version of Capture One 20 by going to Preferences within Capture One, and selecting “Check for Updates” in the Updates tab.
For decades, Phase One has been recognized industry-wide for their uncompromising pursuit of perfect image quality, and with the release of the IQ4 last year, they promised an ever-evolving, seamlessly-modular, imaging powerhouse — the Infinity Platform. Through the release of new tools, software, and hardware integrating cohesively into the IQ4 ecosystem, Phase One has shown their dedication to making good on that promise.
With today’s latest firmware release, Phase One is taking things one step further, and inviting its clients into its development process. Ready to step into the Phase One Lab?
What is Phase One Lab?
Phase One Lab is a new setting available on the IQ4 150MP digital back (as of now, Lab mode is available on all IQ4 backs, but the current tools are exclusive to the 150MP sensor).
Activating Lab mode unlocks new creative tools before they are officially released in finalized firmware. We expect most of these features to be computational imaging based — improving image quality via digital processing, rather than upgrading hardware. With over 10 times the power of any previous digital back, the IQ4’s on-board computer is primed to generate composite images from multiple exposures.
Frame Averaging, released in one of the earliest IQ4 firmware updates, was the first example of this, and the first Lab feature, DualExposure+, works in a similar way.
What is DualExposure+?
DualExposure+ is a feature that can dramatically increase dynamic range, reduce noise, and improve shadow detail in images by blending data from two overlapping electronic shutter captures. In short, the feature takes two captures around 3 stops apart, and uses the brighter capture to fill in shadow detail in the darker image when processed in Capture One.
DualExposure+ relies on the electronic shutter, so a tripod is still critical, and rapid movements across large parts of the frame can cause rolling shutter effects, but subtle movements like water, leaves, and crowds render just fine (as you’ll see later). When the tool is activated, the first exposure is set by the user, while a second exposure, 3 stops brighter, is automatically initiated before the first exposure ends. This results in two raw files, exposed as close to simultaneously as possible for optimal blending.
These two images are then packaged into a single raw file containing the data from both exposures. It’s worth noting that these are true RAW files. There’s no rasterization of data, or behind-the-scenes shenanigans as there are with some flavors of DNGs — no, this is simply two IIQ files collated into a single package.
The IQ4 orchestrates the exposures, but Capture One is where the real magic happens. As you adjust the High Dynamic Range and Exposure sliders, Capture One seamlessly interpolates shadow detail from the secondary image into the main image, rather than simply pushing the shadows in the first file, which amplifies unwanted noise in addition to the desired content. What does this look like in practice though? Let’s look at some files!
Quick note — Capture One may show image artifacts on previews of DualExposure+ images with significant shadow recovery. This is normal and only a visual issue, zooming into the image will render the image correctly.
Sunsets and Shadow Detail
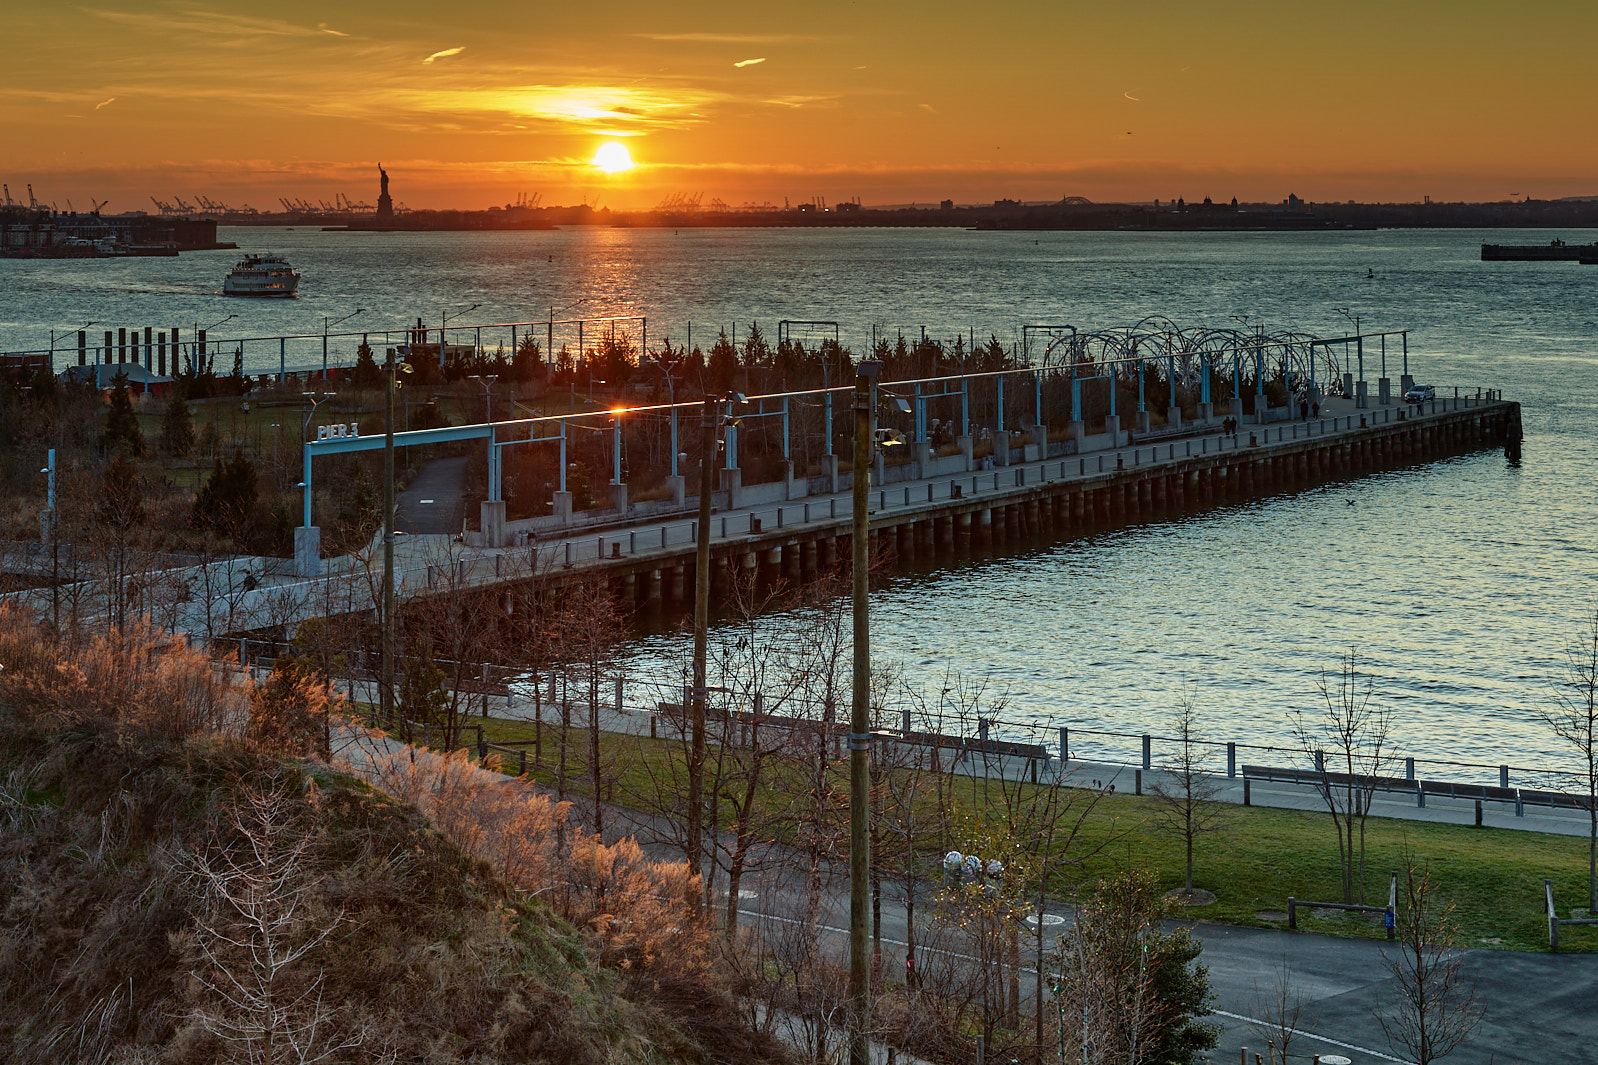
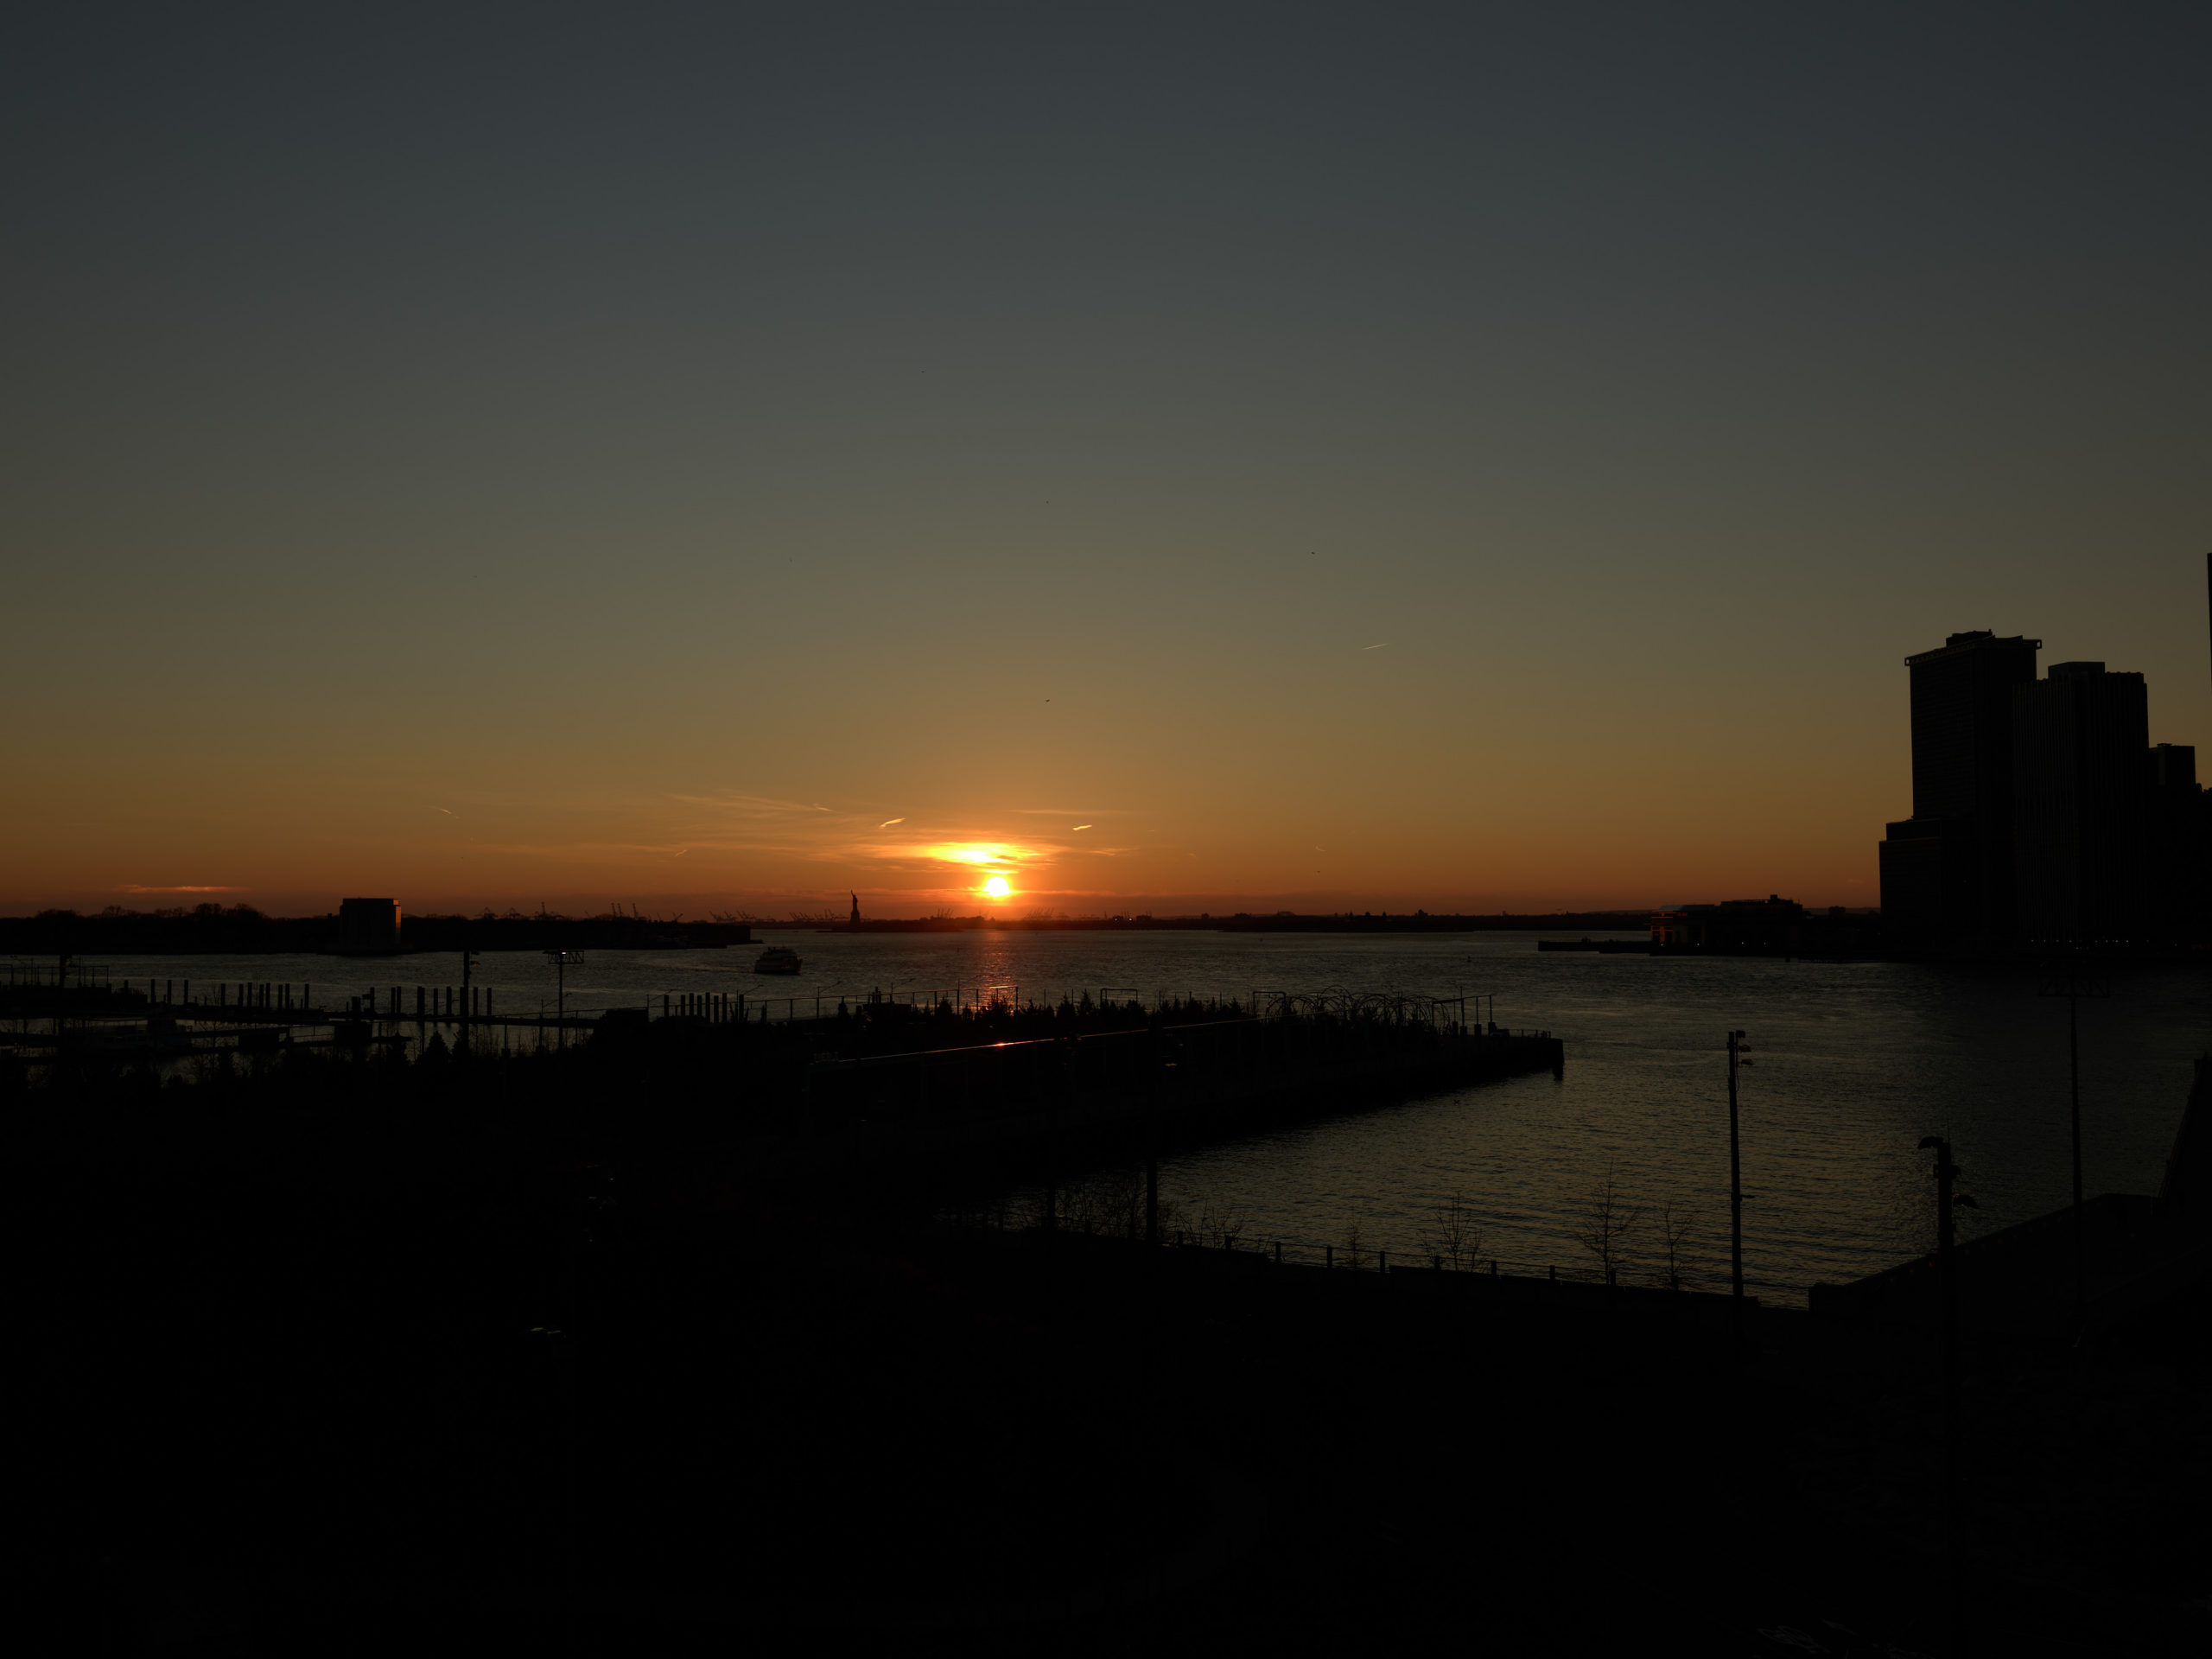
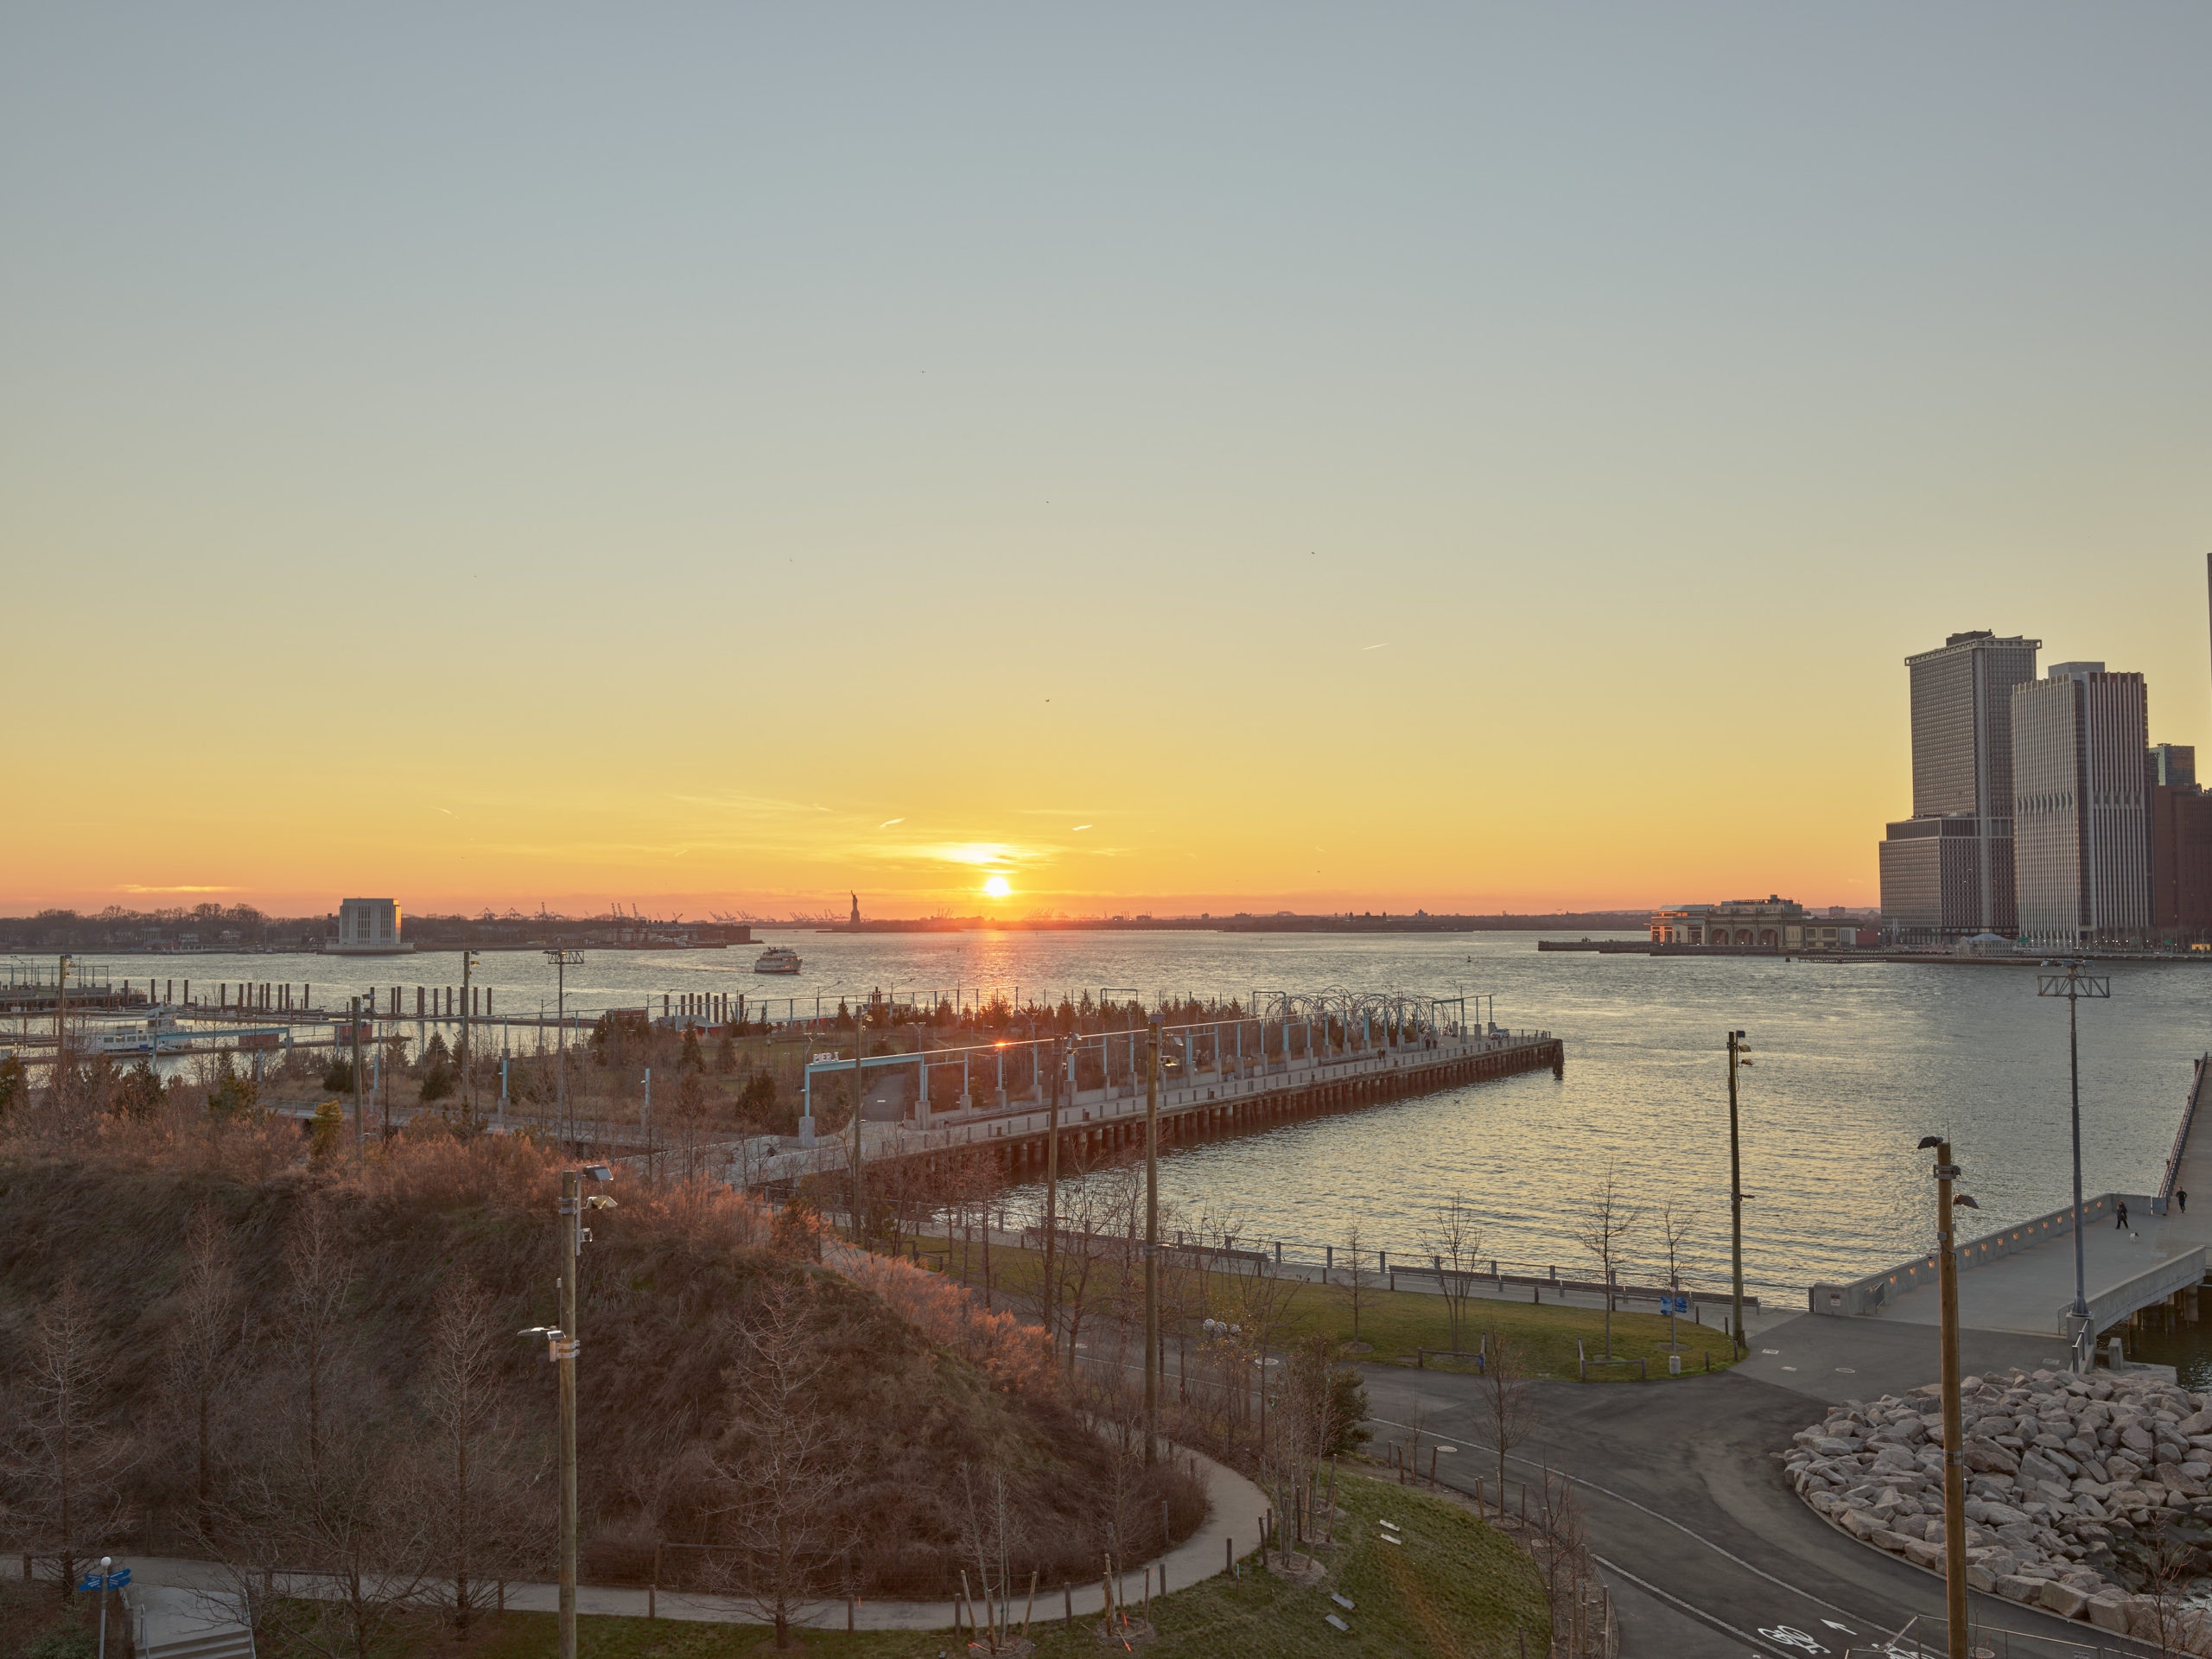
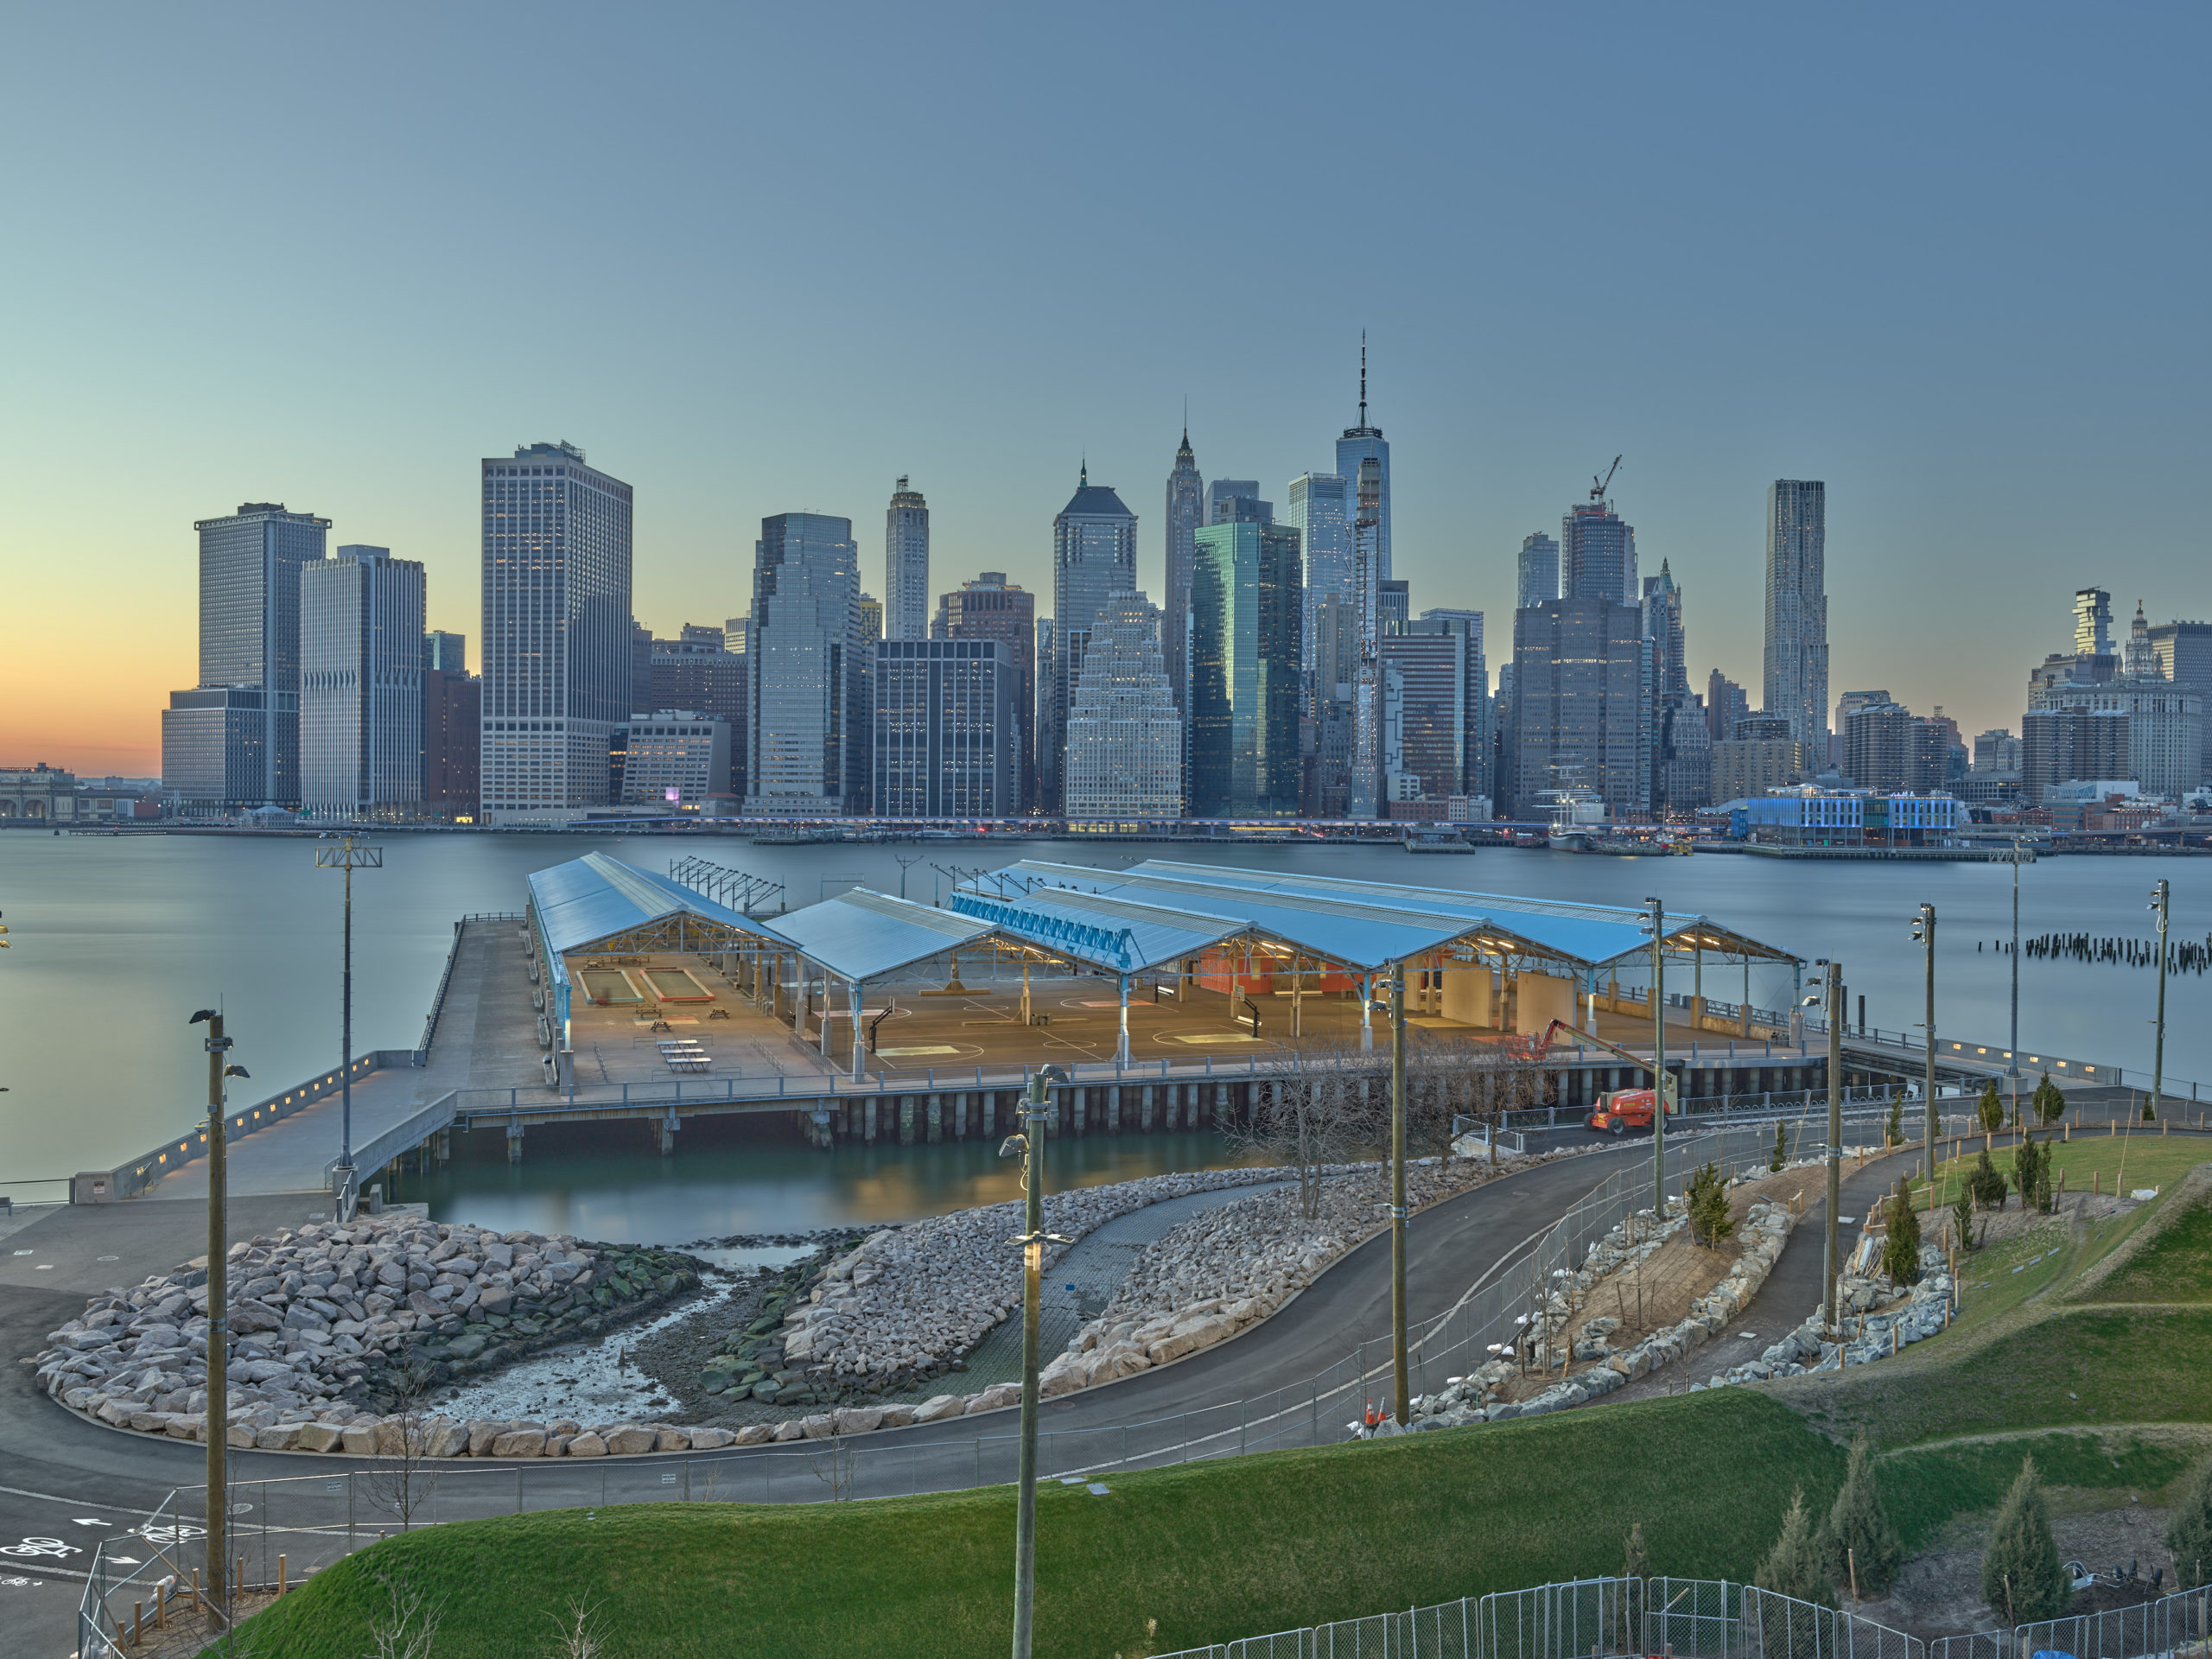
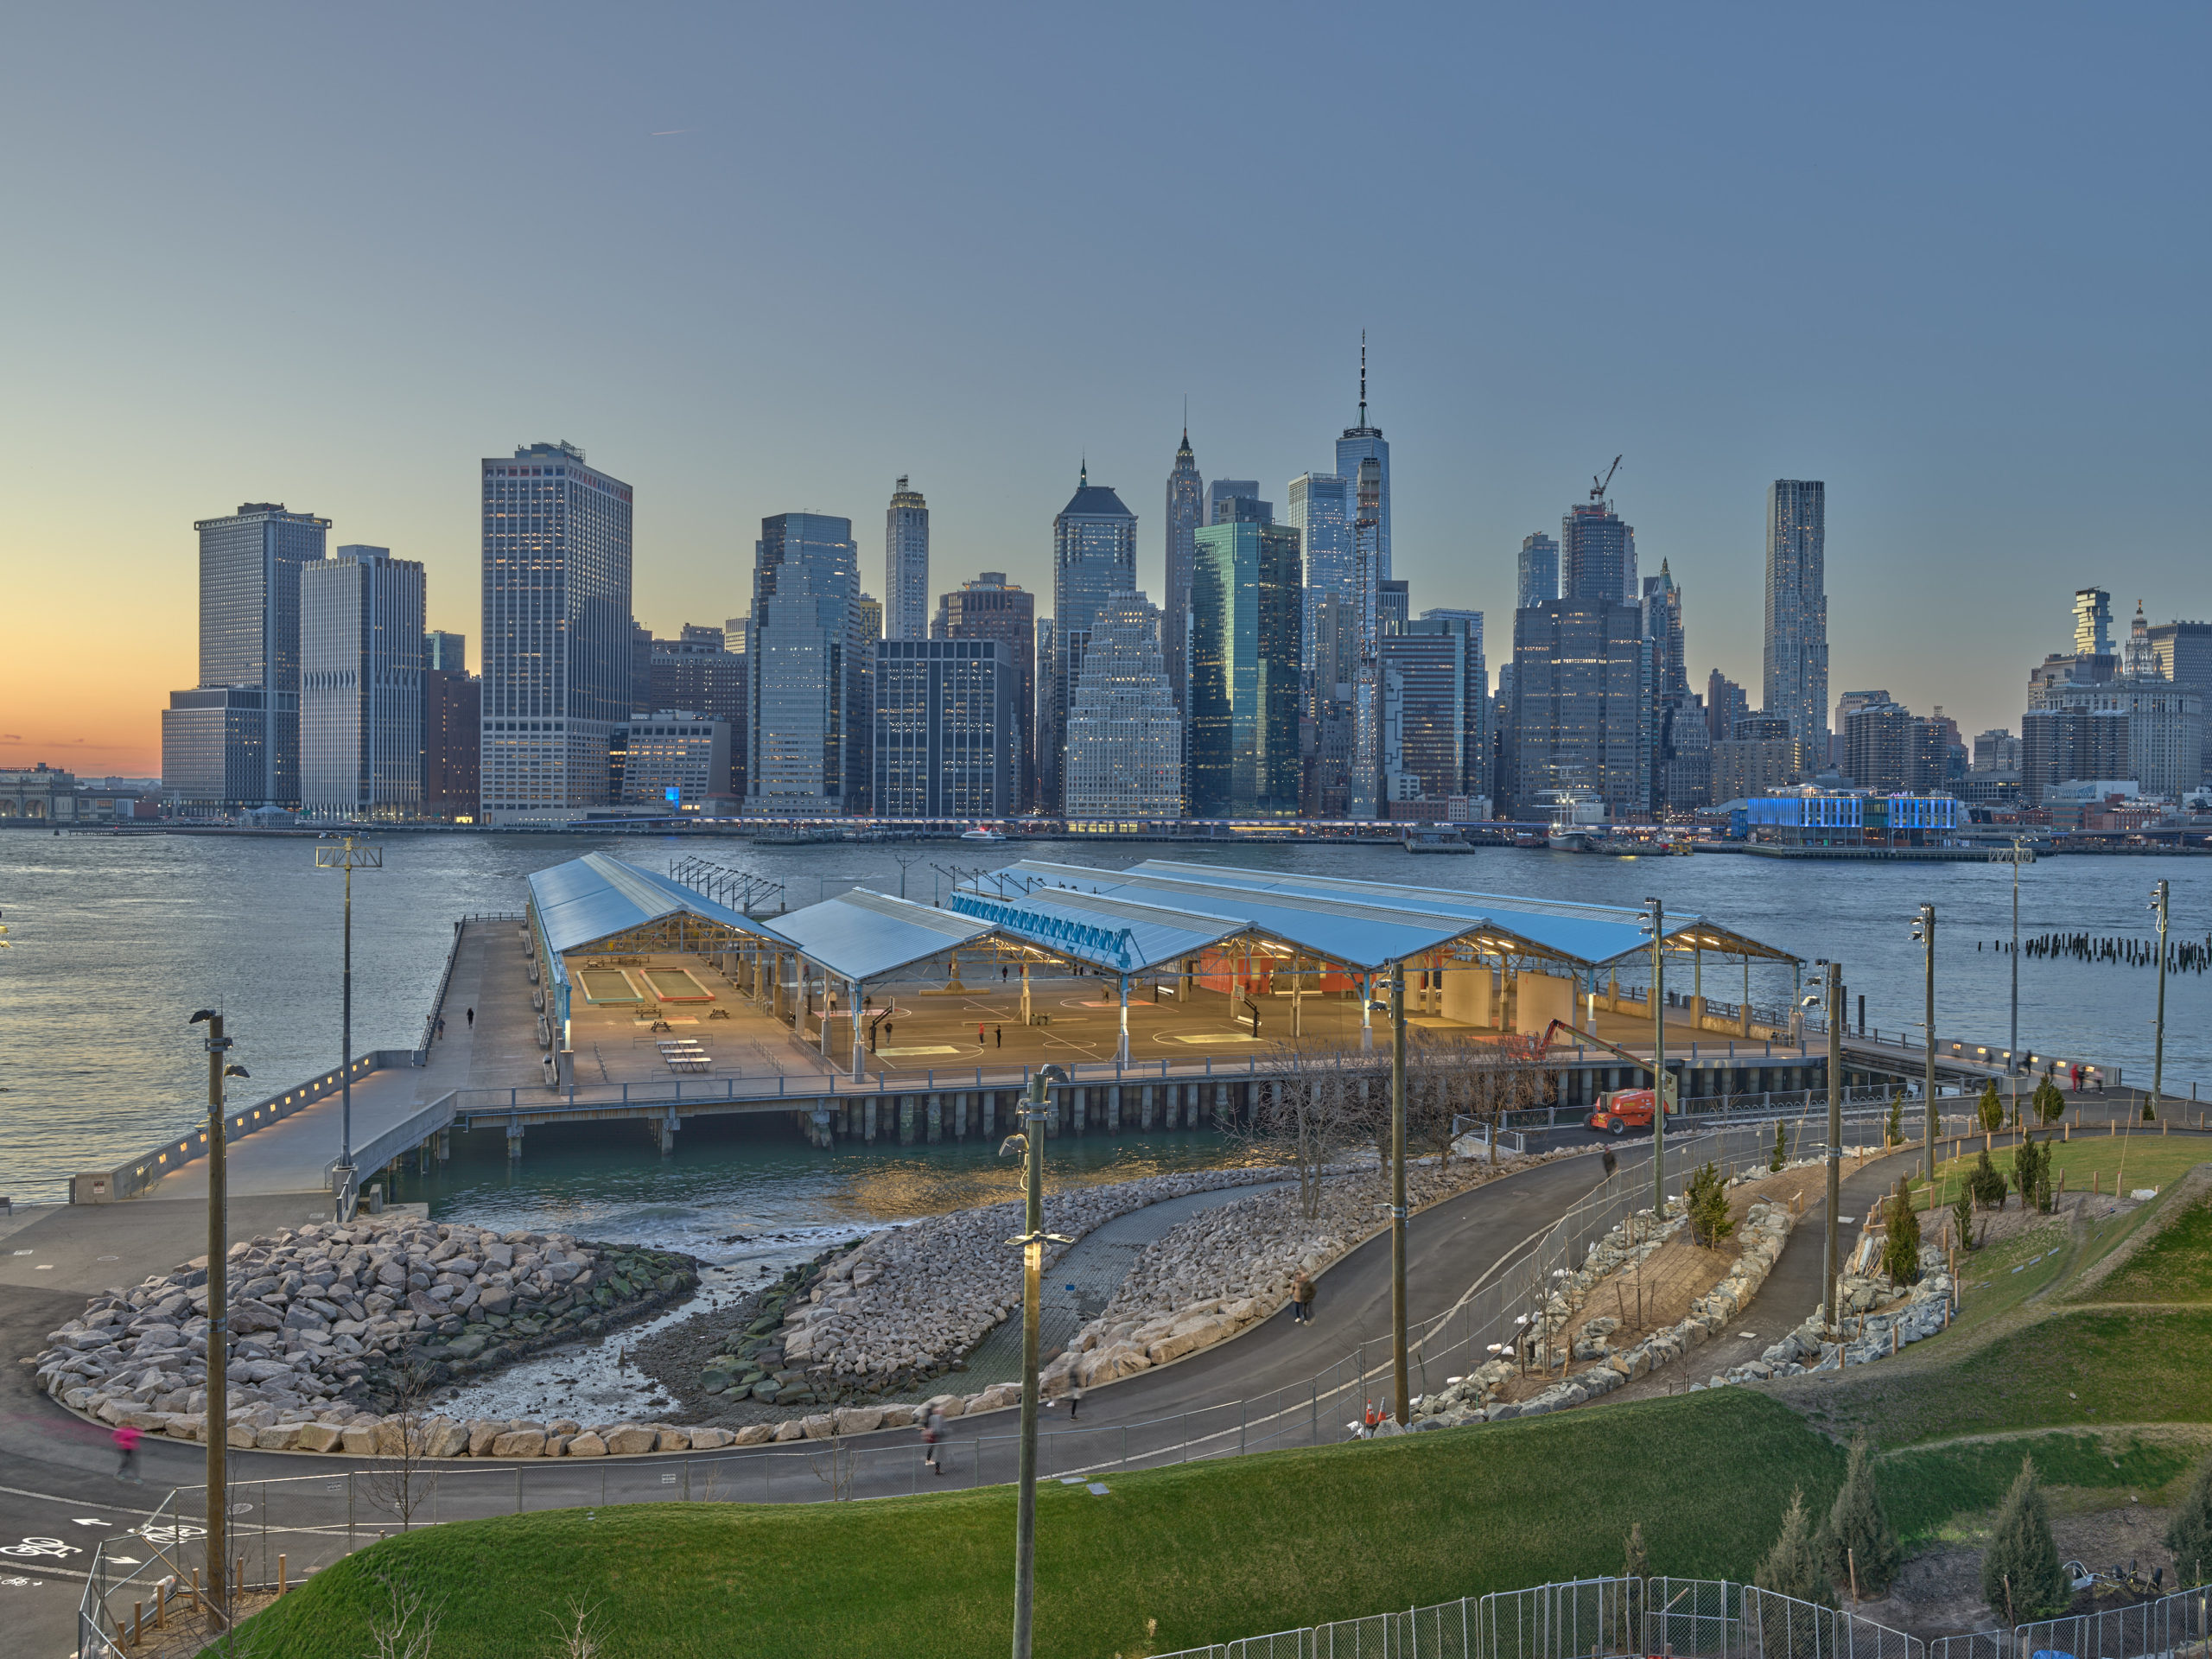
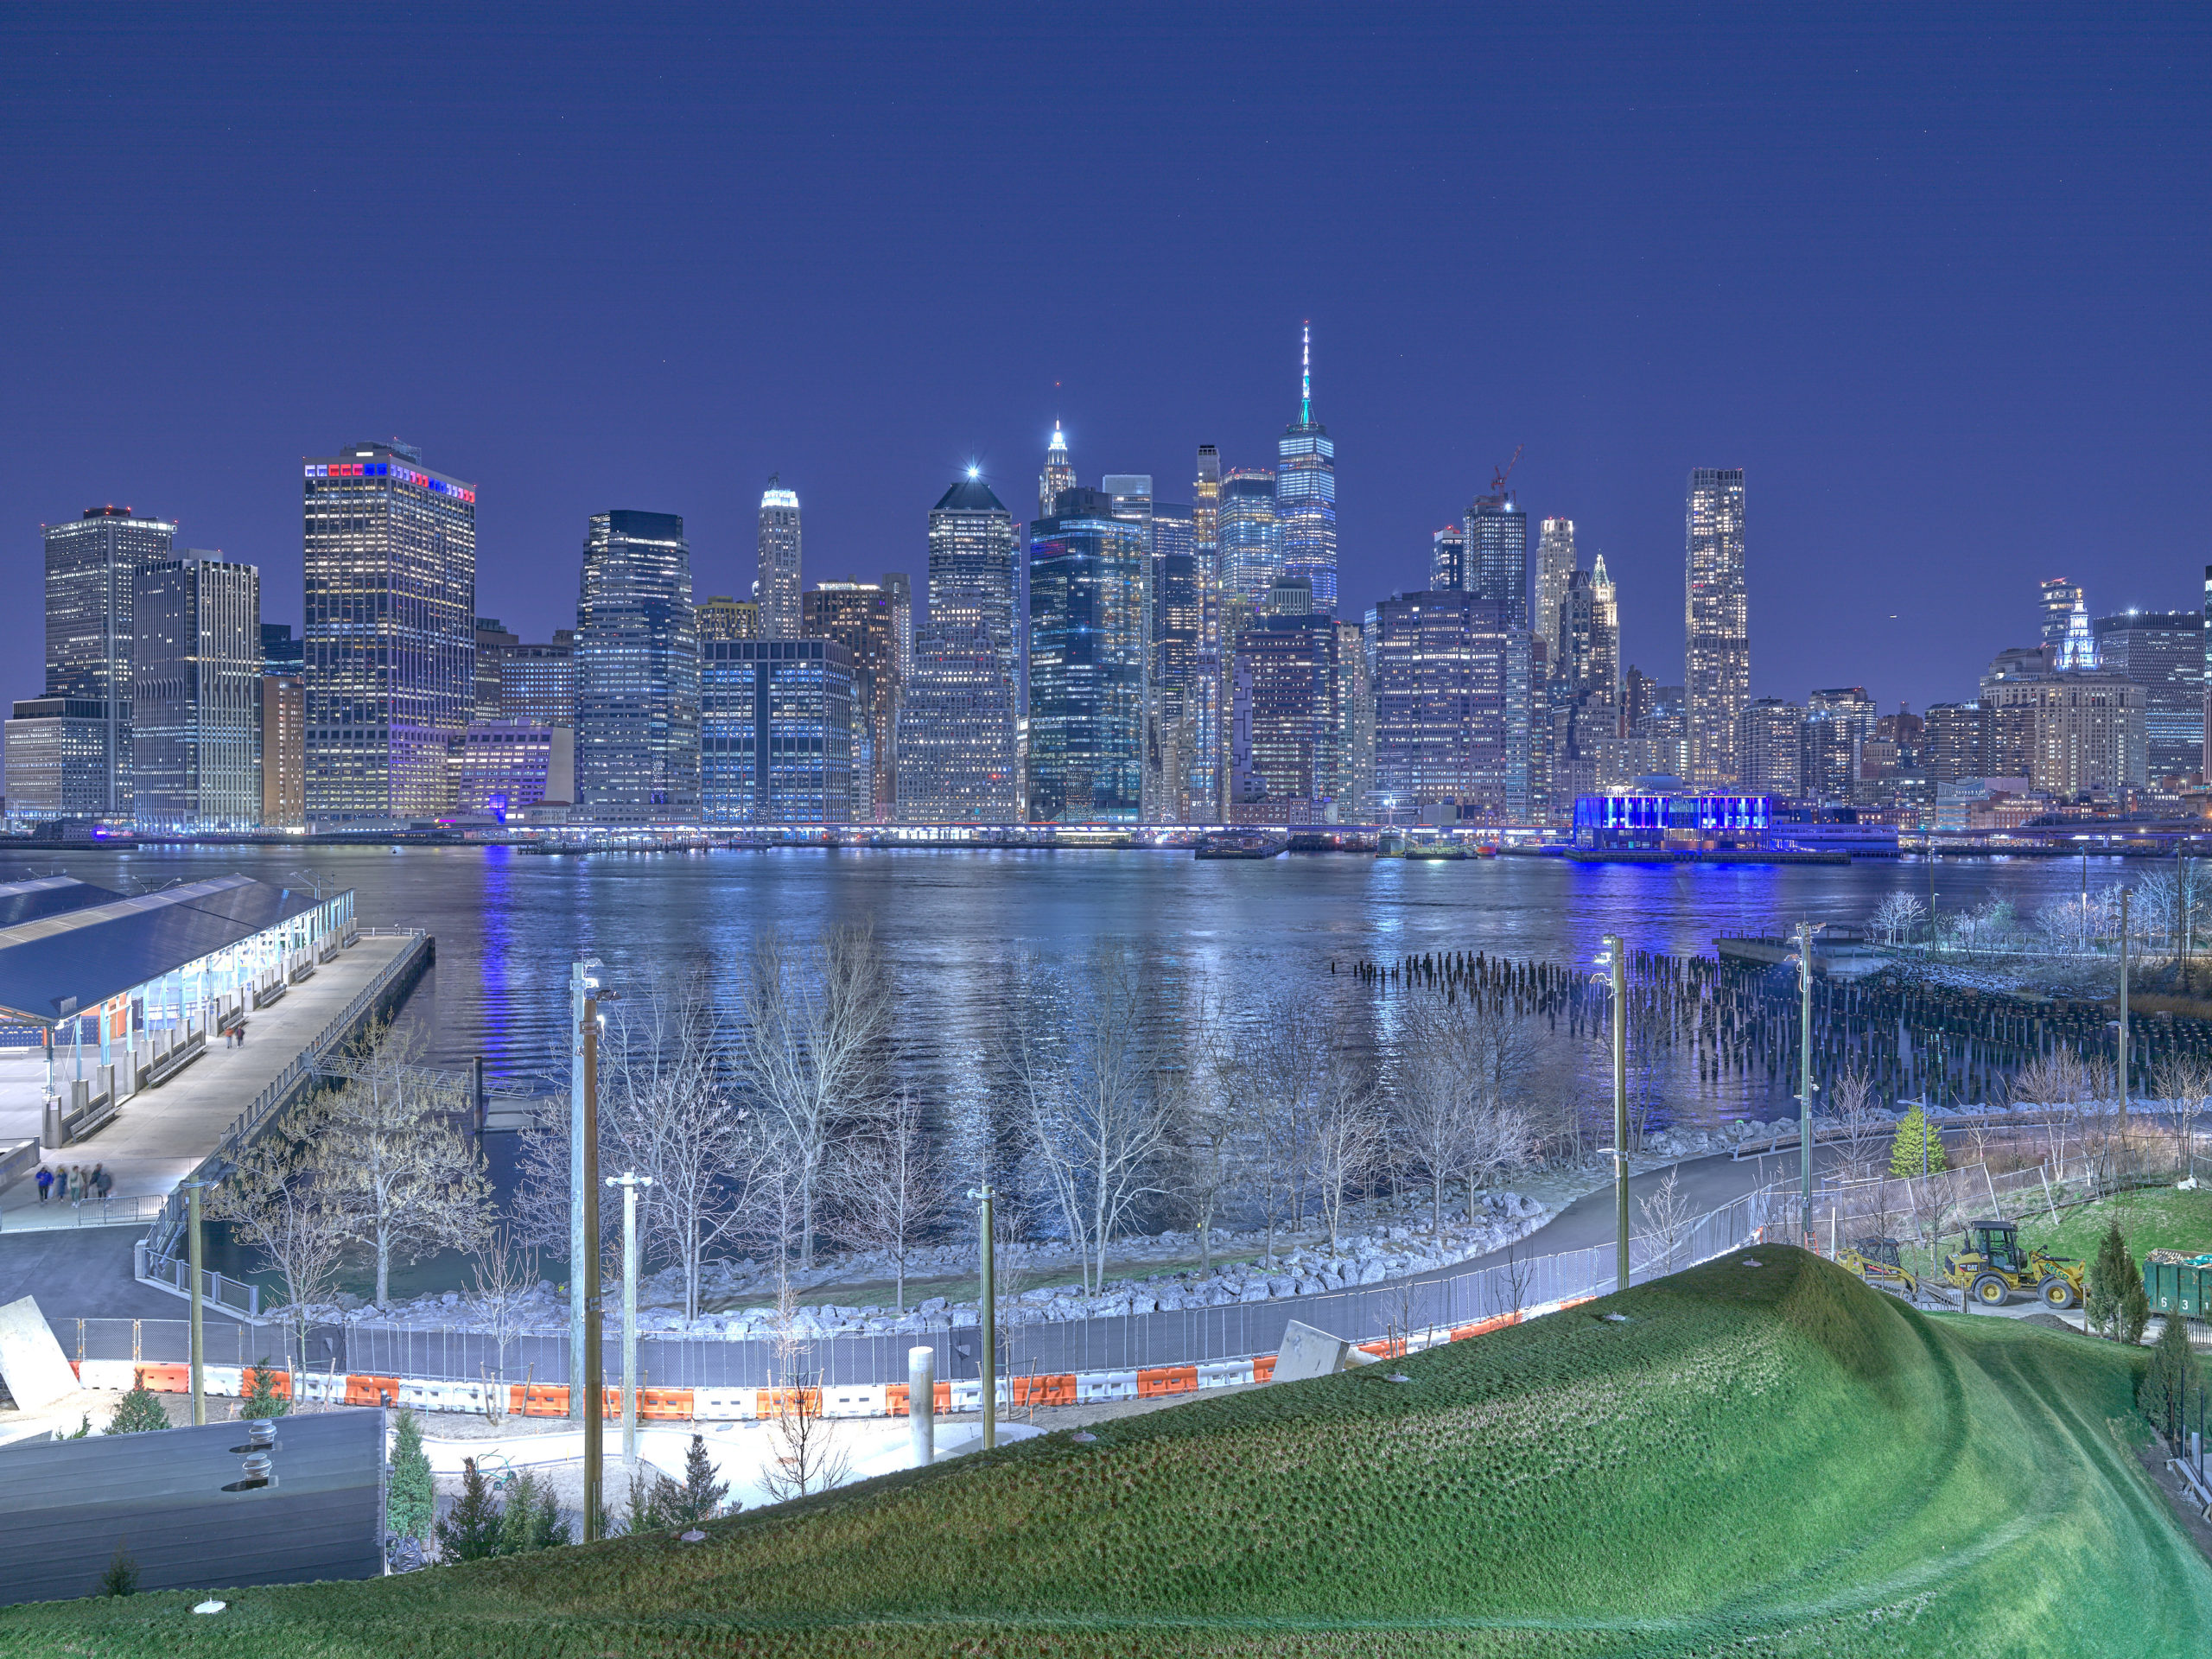
I took an XF and IQ4 150MP over to the Brooklyn Heights Promenade around sunset to capture nature’s highest dynamic range offering — a sunset!
DualExposure+, in its current state, always captures the second image 3 stops over your chosen exposure. This means that you MUST protect your highlights in the exposure you dial in. Fortunately, the true RAW histogram on the Live View tool, or exposure warning in the image review tool make this easy to set properly.
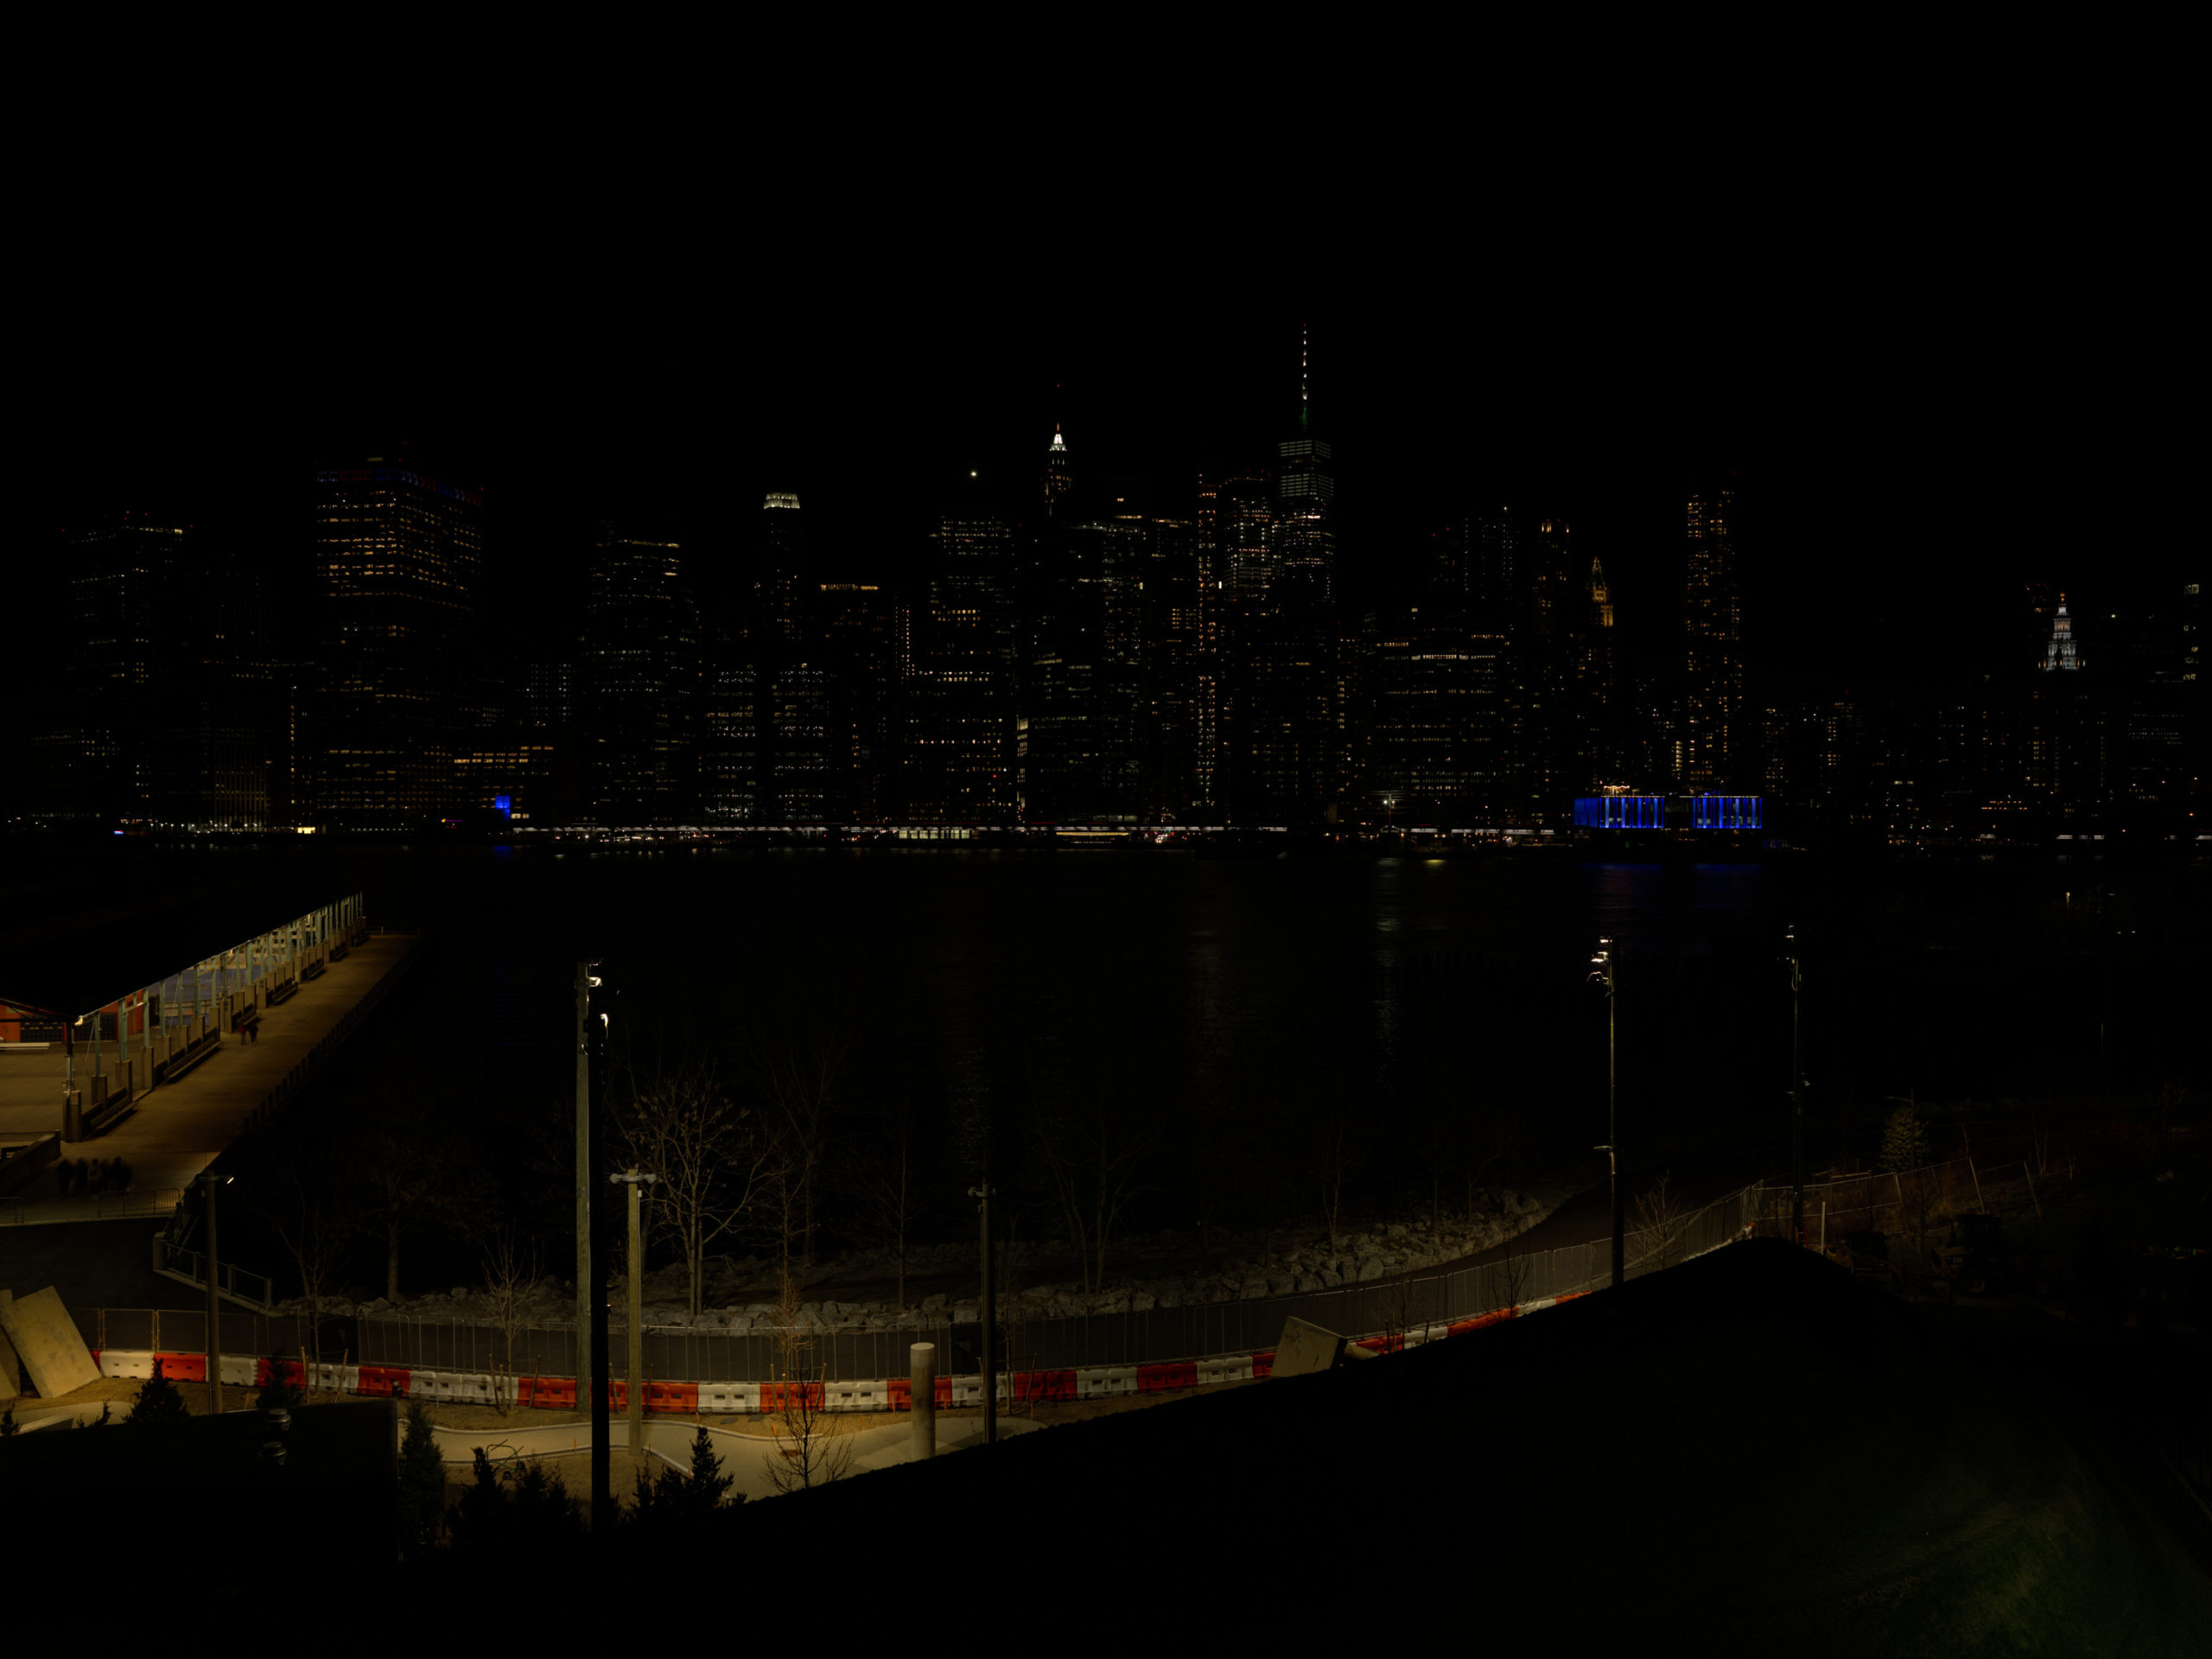
Once your exposure is set, select DualExposure+ by swiping from the right on the camera menu, and let it do its thing! The overall process takes an additional couple of seconds, but since DualExposure+ currently caps the first frame at 0.9 seconds and 400 ISO, the process never takes more than 10 seconds, even at the slowest exposures. Here you can see the image as it was exposed to the right, and then with shadow recovery in Capture One.
-
Before Shadow Recovery After
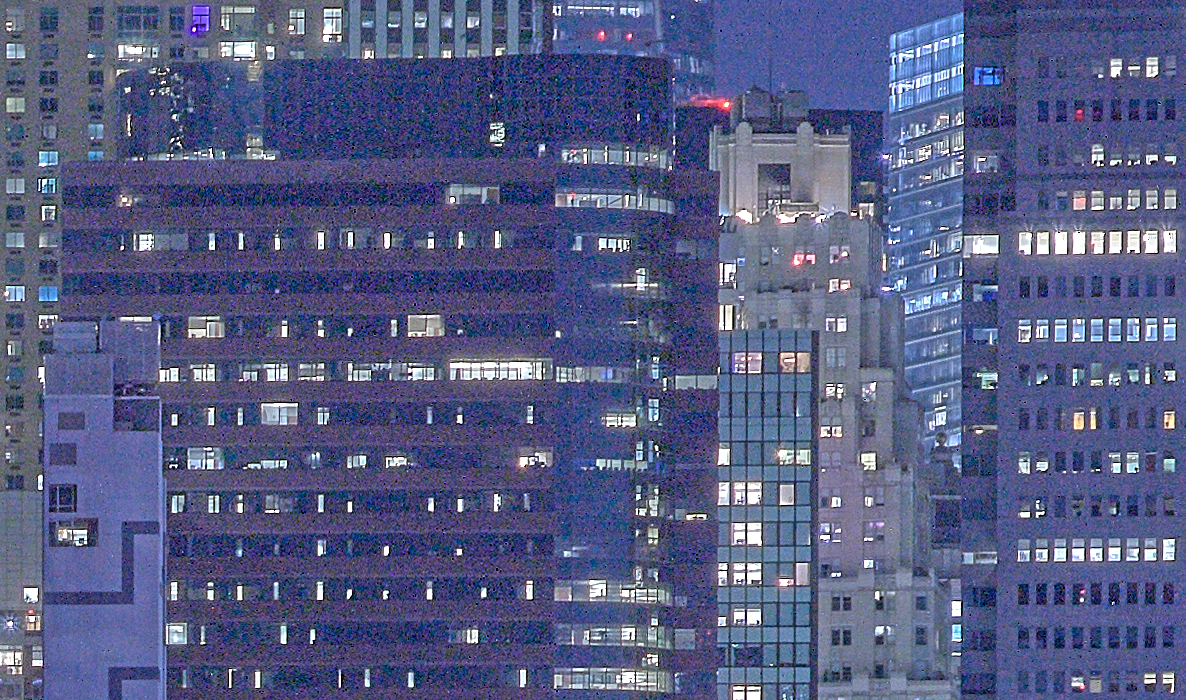
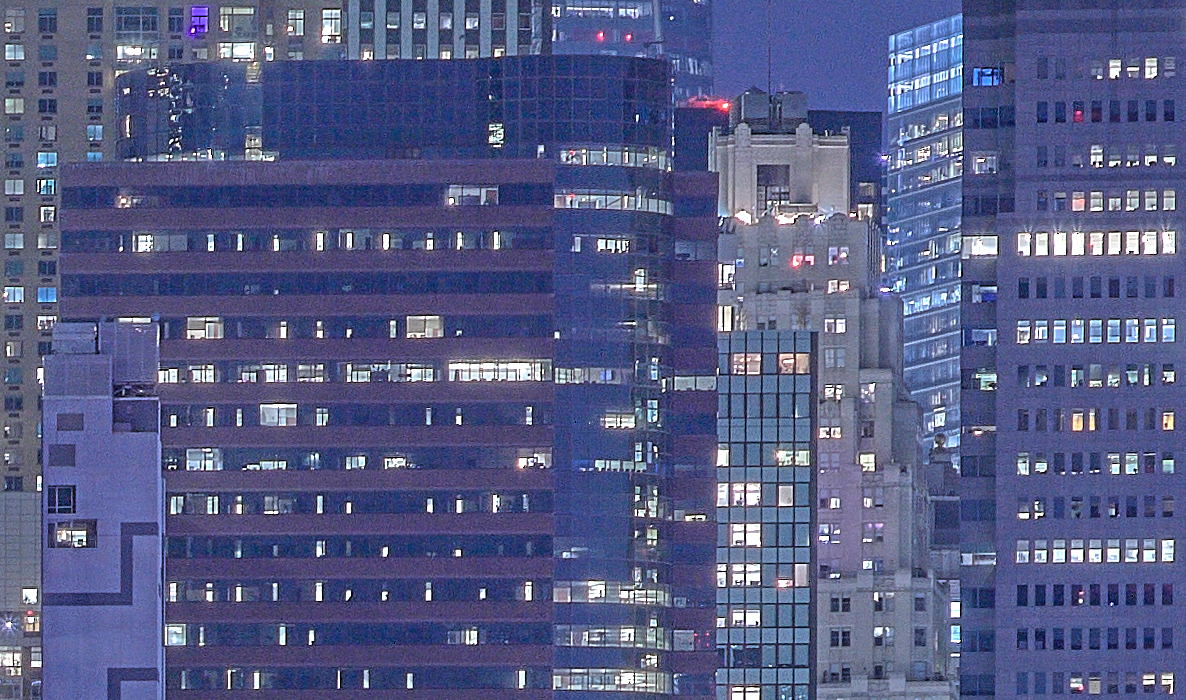
This was once an impressive party trick in and of itself, but Phase One users got used to having shadow recovery of that caliber about a decade ago. The key lies in the details. Here’s a 200% crop:
-
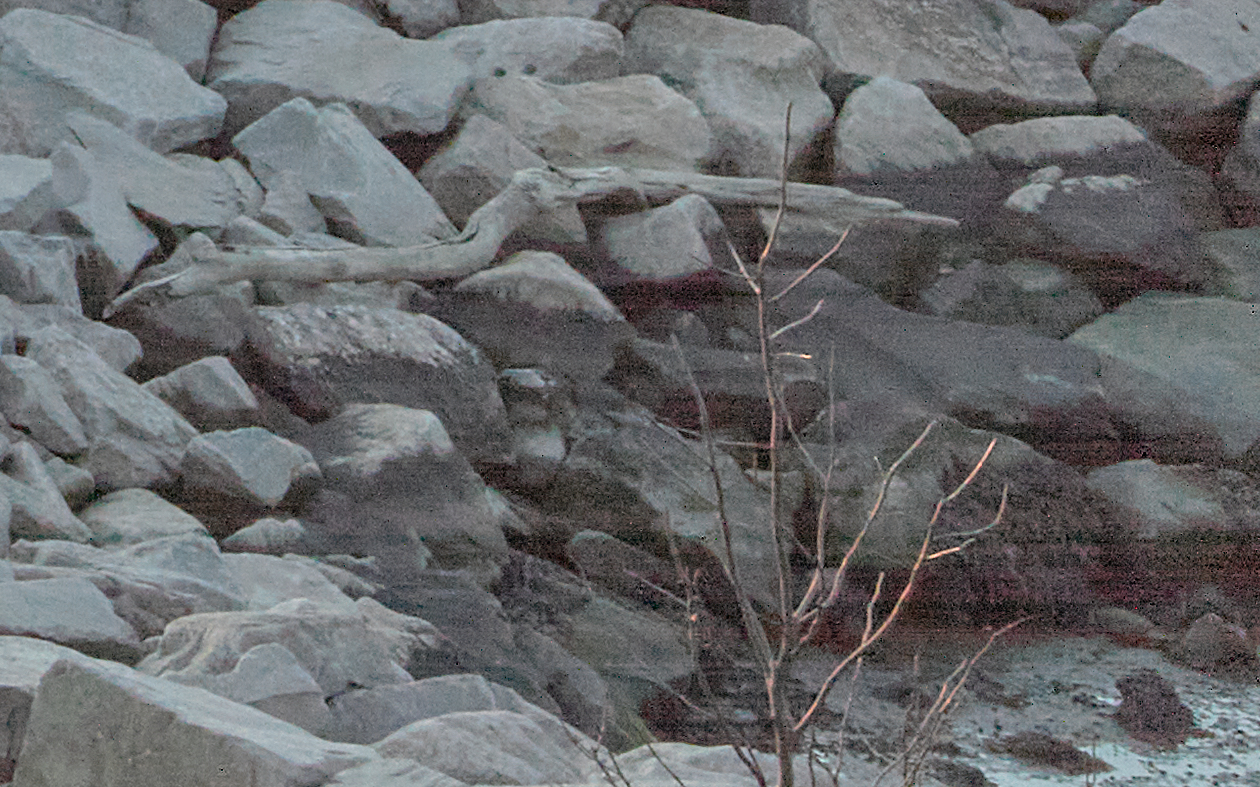
Standard Capture 200% Crop DualExposure+
What an incredible difference? Noise is gone, the shadows are sharper, the details are more contrasty, and even banding from extreme pushing of electronic shutter images is GONE. And the overall process for this image took under 2 seconds in the field, and the workflow in Capture One was exactly the same.
DualExposure+ vs Frame Averaging
In our previous blog article on Frame Averaging, we noted that longer exposures using the tool resulting in lower noise and increased dynamic range. But DualExposure+ was designed to cut down noise and increase dynamic range, so how do the two tools compare?
First off, it’s not an entirely practical comparison. Frame Averaging yields fundamentally different images, given the length of the required exposures. Here you can see a 5 minute Frame Average vs a DualExposure+ image with full shadow recovery:
-
5 min Frame Average Frame Averaging vs DualExposure+ DualExposure+
There are differences in the appearance of moving parts of the image, as one would expect. Frame Averaging was developed with the intent of capturing long exposures without having to use ND filters. The noise reduction is a welcome benefit, but is unpredictable and can eat up significant amounts of time, where DualExposure+ takes under 10 seconds. Later that night, I compared it to a 10 second Frame Average:
-
10 Second Frame Average 200% Crop DualExposure+
The results aren’t even close — DualExposure+ wins by a mile! As we expected, while both tools have a similar effect on noise, Frame Averaging wins on long exposures, and DualExposure+ is better at purely cutting noise and expanding dynamic range!
What DualExposure+ Can’t Do
DualExposure+ works wonders even in tough scenes, but it’s computational imaging, not magic. It can only do so much.
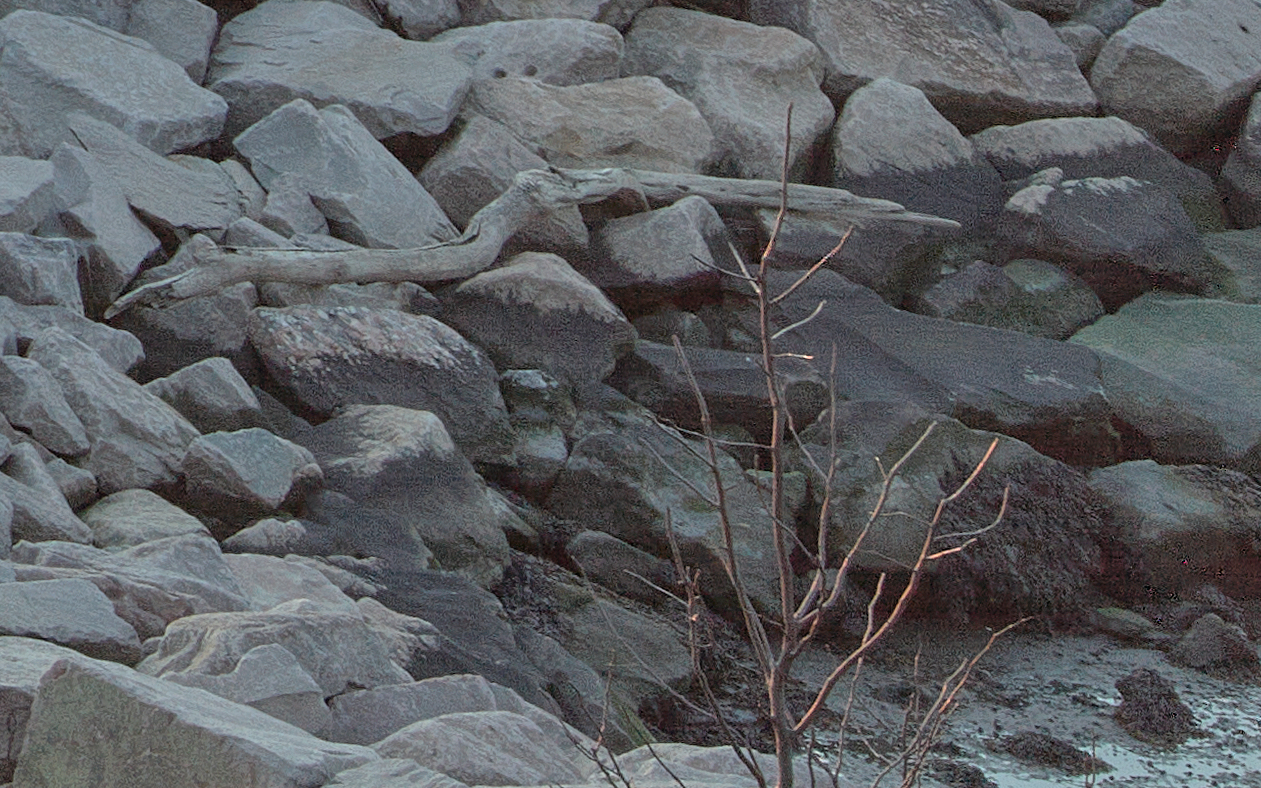
In the images below, I tried something truly ridiculous — I wanted to expose so far to the right that the city lights weren’t clipping. There’s absolutely no information in them and therefore no reason to do so, but I wanted to push the tool as far as possible. The result was the image below:
-
Before Shadow Recovery After
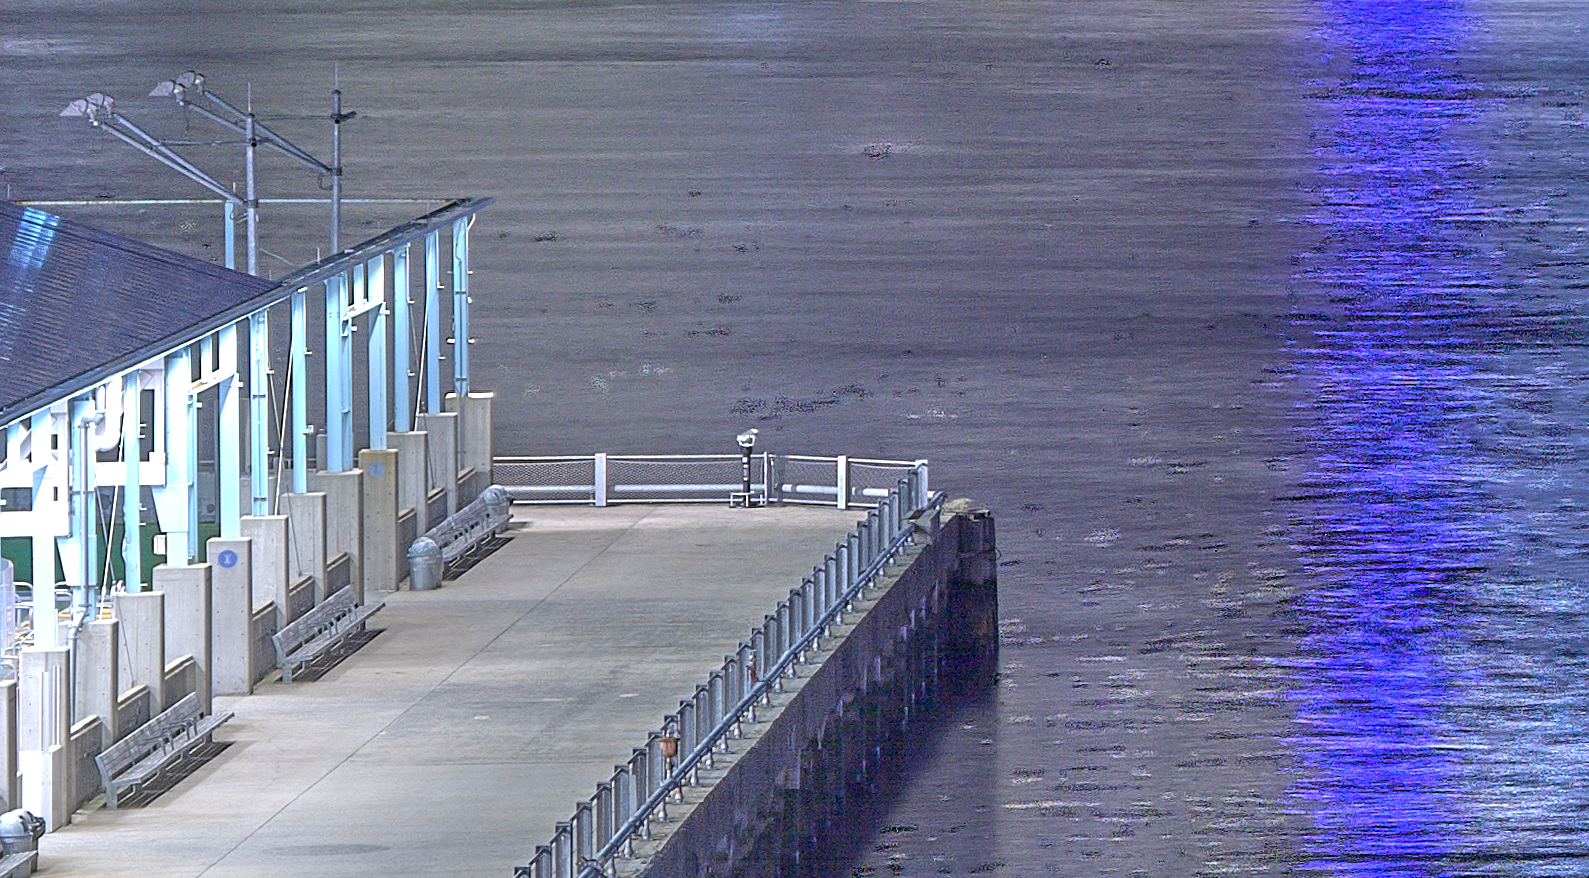
The fact that we’re getting ANYTHING out of this file is pretty incredible. But on closer examination of the image, we see odd artifacts like these ones below:
When I spoke to Phase One, they explained that my initial exposure was so dark that it was pretty much just noise and the secondary exposure was still significantly underexposed. The algorithm works the best it can, but this all reinforces the golden rule of all computational imaging, whether it’s on an iPhone (which, by the way, uses a very similar method for HDR) or an IQ4: Garbage in, garbage out.
So DualExposure+ is not a magic wand that lets you push your shadows as far as you want. But as we saw in the sunset images, as long as you keep your exposures reasonable, you can expect great results.
Conclusion
DualExposure+ is a very clever tool, and Phase One Lab is surprisingly robust and stable in its current state. The uniqueness of the feature lies not so much in how it captures data — it’s fancy digital bracketing, which is hardly new — but in how Capture One seamlessly processes the resulting files, maintaining the RAW workflow and delivering the associated flexibility and image quality without making the process any more complicated.
In an overall comparison of the images we shot, we found that we always see at least a 2 stop improvement in dynamic range across the board, and in most cases, see a 3 stop improvement.
So what do you think? Are you ready to try it out? Fill out the form below to download sample RAW files, or contact us for more information, firmware update help, scheduling a demo at one of our showrooms, and more!
NOTE: Capture One 20.0.3 (released today) is required to fully access the benefit of DualExposure+. Previous versions of Capture One will show the raw file, but can only access the shorter exposure data, and so will not show any DualExposure+ noise reduction / dynamic range benefit.